Looking for help with HMIS?
In this article, we will review how to add a signature to a document using Adobe Acrobat (web version). This service can be used when signing the User Agreement & Code of Ethics as a new Homeless Management Information System (HMIS) user.
Things to Know
Main parts to signing a document
There are three main parts to signing a document in Adobe
- E-Sign menu
- Adding a signature
- Using draw or type to enter a signature
E-Sign Menu
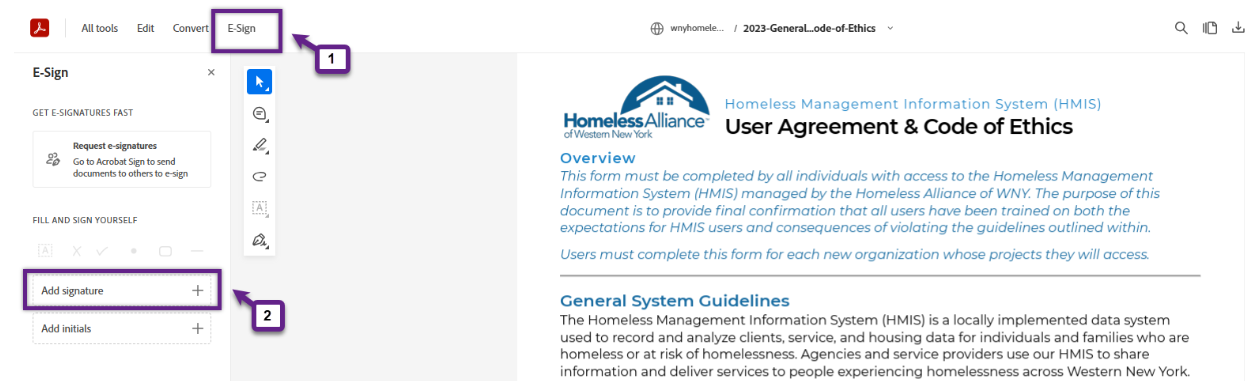
The E-Sign menu (1) is located in the top left menu bar of Adobe Acrobat. This is where you can add initials and signatures to documents digitally.
Adding a Signature
The Add Signature (2) button is located within the E-Sign menu. The Add Initials button is also located here.
Using Draw or Type
Once you choose to add a signature, you can elect to do so by typing your full name or by drawing your signature.
Step-by-Step Instructions
This article is intended for HMIS users who need to sign the HMIS User Agreement & Code of Ethics digitally during training. Further information on similar topics can be found under Related Articles.
1.Download the “New HMIS User Agreement” in the HMIS New User Orientation.
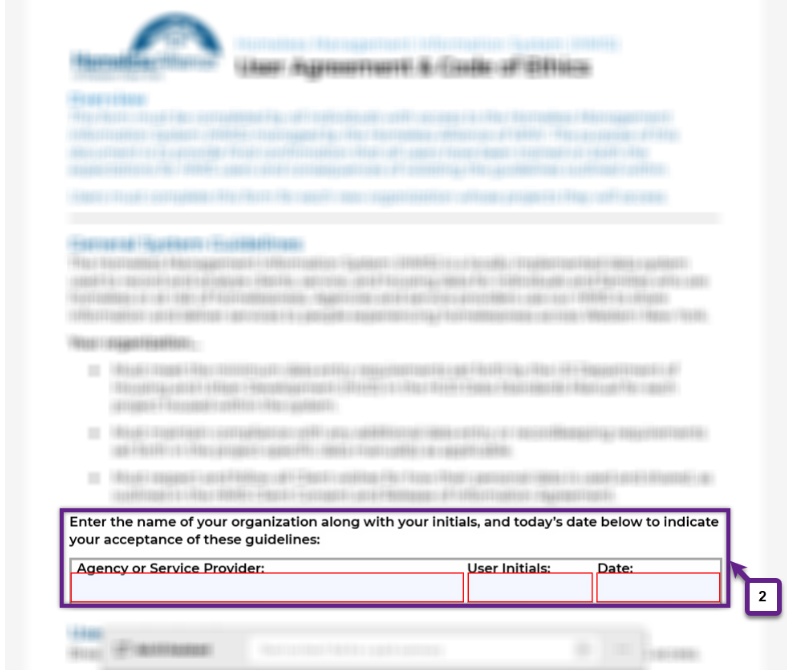
2. Fill in the red boxes (2) on page one of the document that are titled “Agency or Service Provider, User Initials, and Date.” You can do this by clicking the red box and then typing your information in.
3. On page two of the document, click into each red box and enter your initials by typing just as you did above.
4. At the bottom of page two, there are three red boxes that need to be filled in.
-
- First, type in your name where it says “Printed Name.”
- Next, where it says “signature” you are going to create your digital signature.
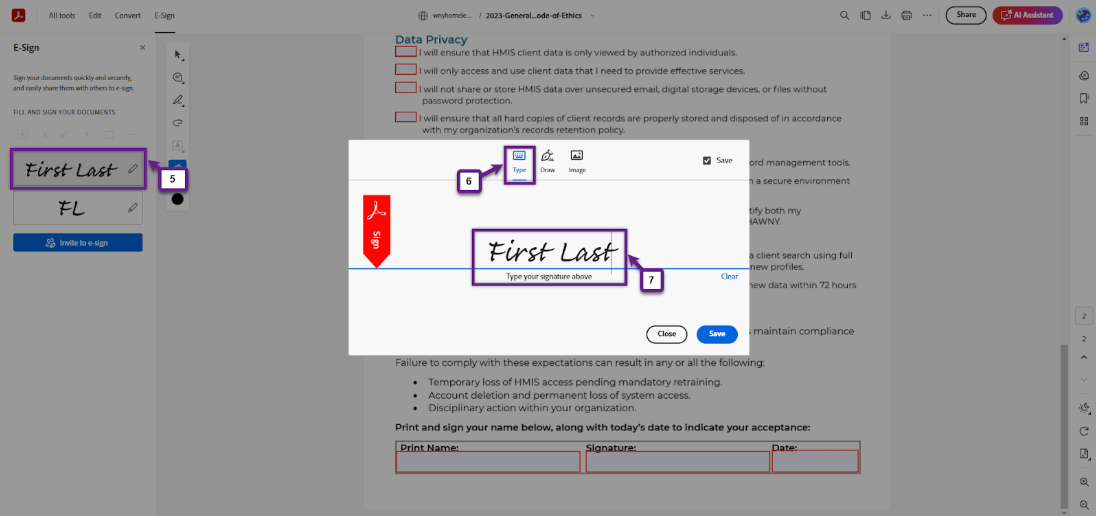
5. Click on the “Add Signature” box (5) on the left side of the page.
6. If you would like to type your signature, click the “Type” option (6) at the top of the pop-up box.
-
- Type your first and last name and click “Save.”
- Click on the signature box of the document and your typed signature will appear.
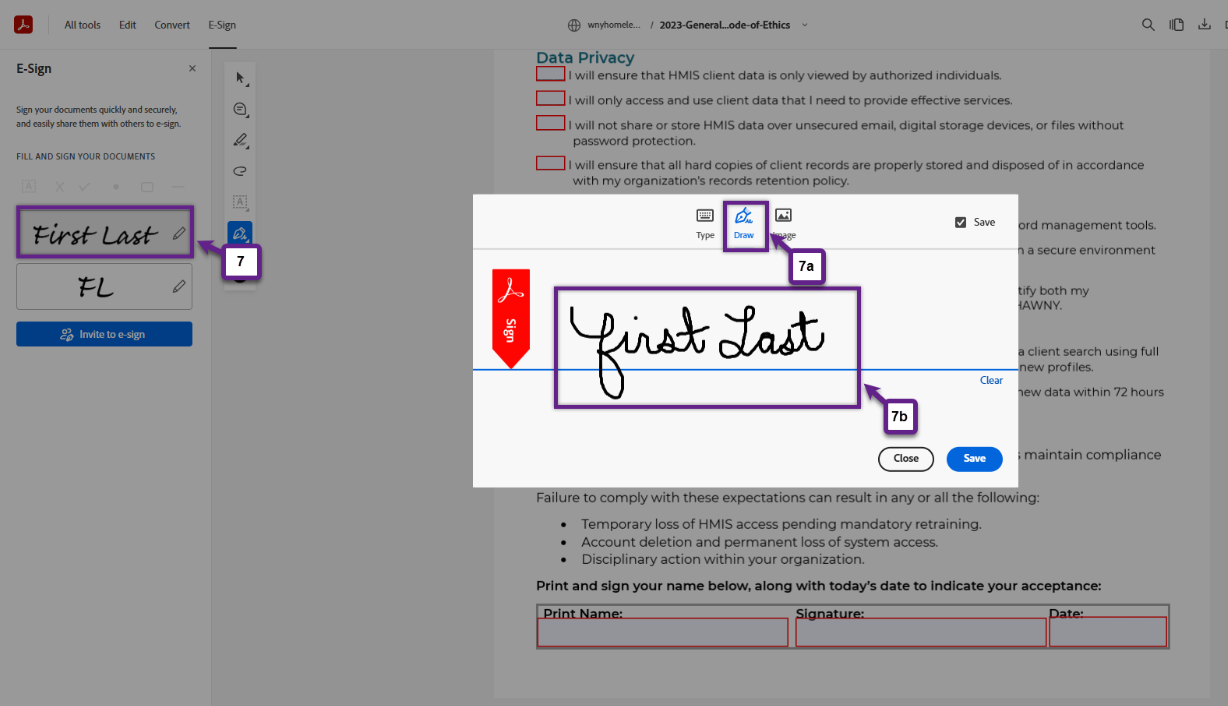
7. If you would like to draw your signature, click the “draw” option (a) at the top of the pop-up box.
-
- Using your mouse or touchpad on your laptop, draw your signature (b) and then click “Save.”
- Click on the signature box of the document and your signed name will appear.
Saving & Uploading
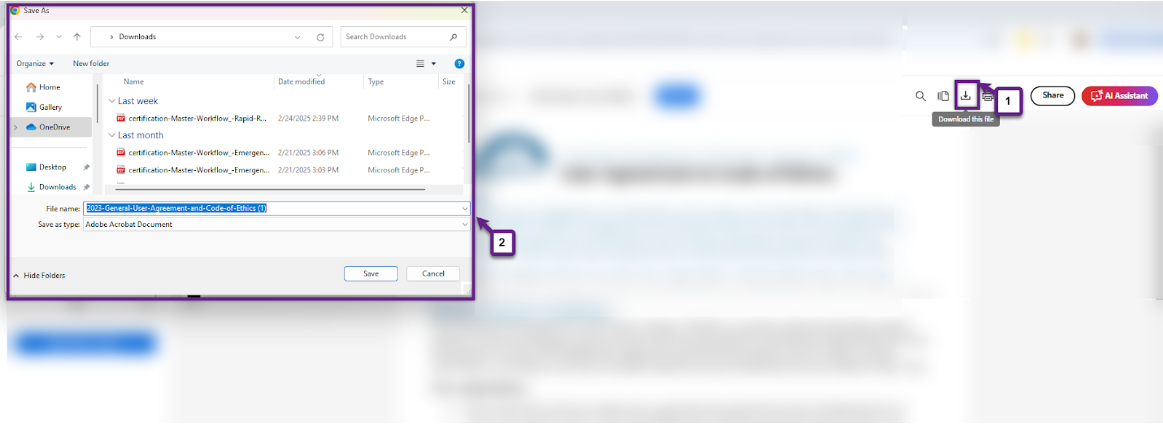
- To save and upload your signed document, click on the download icon on the top right of your screen.
- Enter the file name as “FirstName_LastName_UA” and save.
- In the New User Orientation HMIS course, there is an “Upload Document” button where you will now upload your saved document to submit for review.
Related Website
Related Articles
Logging Into HMIS and Resetting Passwords
Still having trouble?
If you still have questions about how to sign and upload your HMIS User Agreement & Code of Ethics, please contact the HMIS Administration Team at [email protected].