Looking for help with HMIS?
In this article, we will review how to enter case notes into the Homeless Management Information System (HMIS).
Step-by-Step Instructions: Case Notes
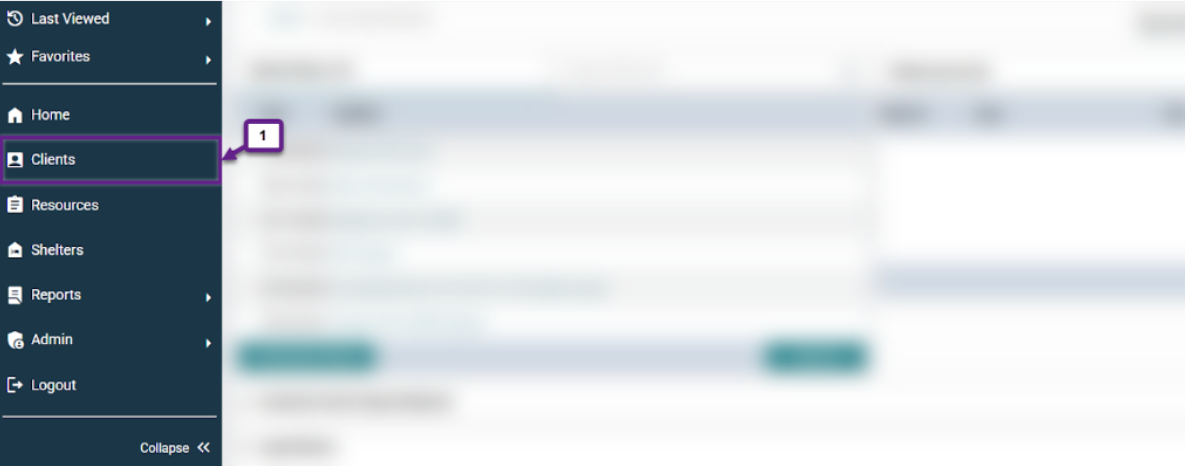
1. Login to HMIS and select “Clients” on the navigation menu.
Type in the client ID# or do a search by using first name, last name and full SSN (if applicable). Please see our article on searching for clients for further information.
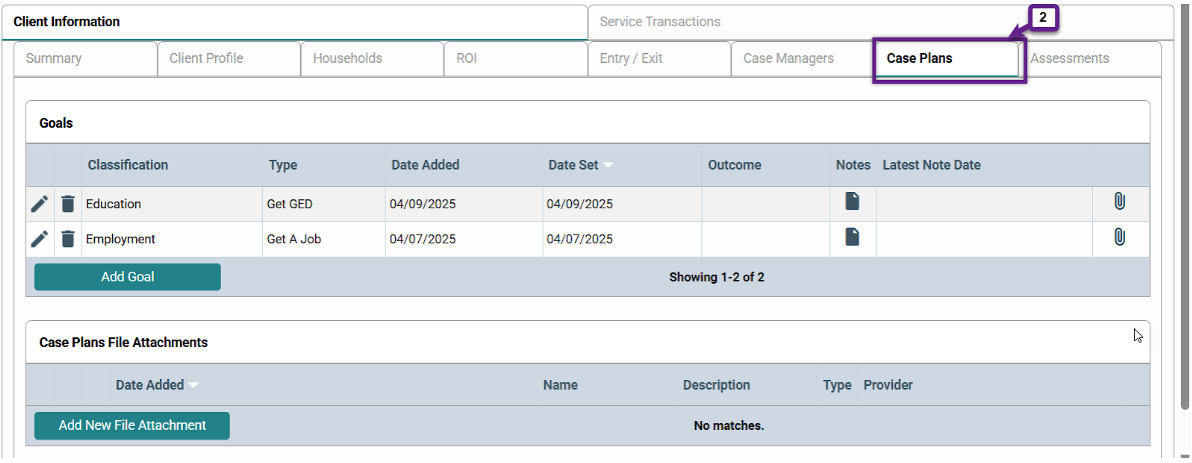
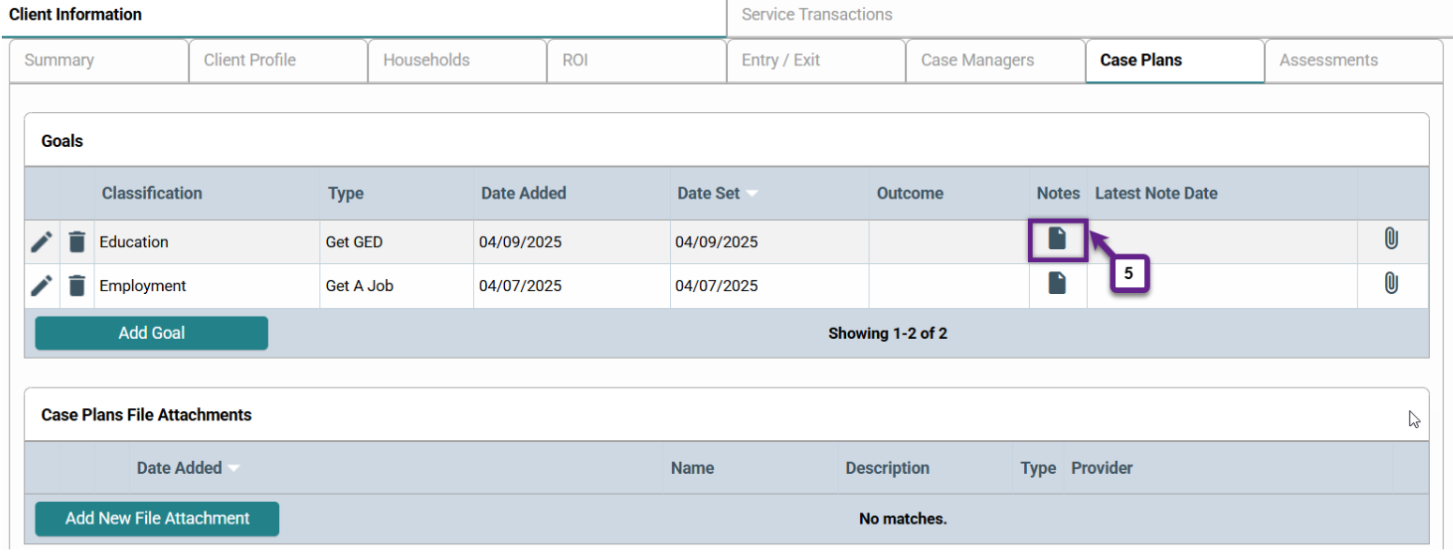
2. Select the “Case Plans” tab in the Client’s file.
Once you have your client pulled up, you will navigate to the case plans tab (2). In this screen, you will see Goals and Case Plans File Attachments.
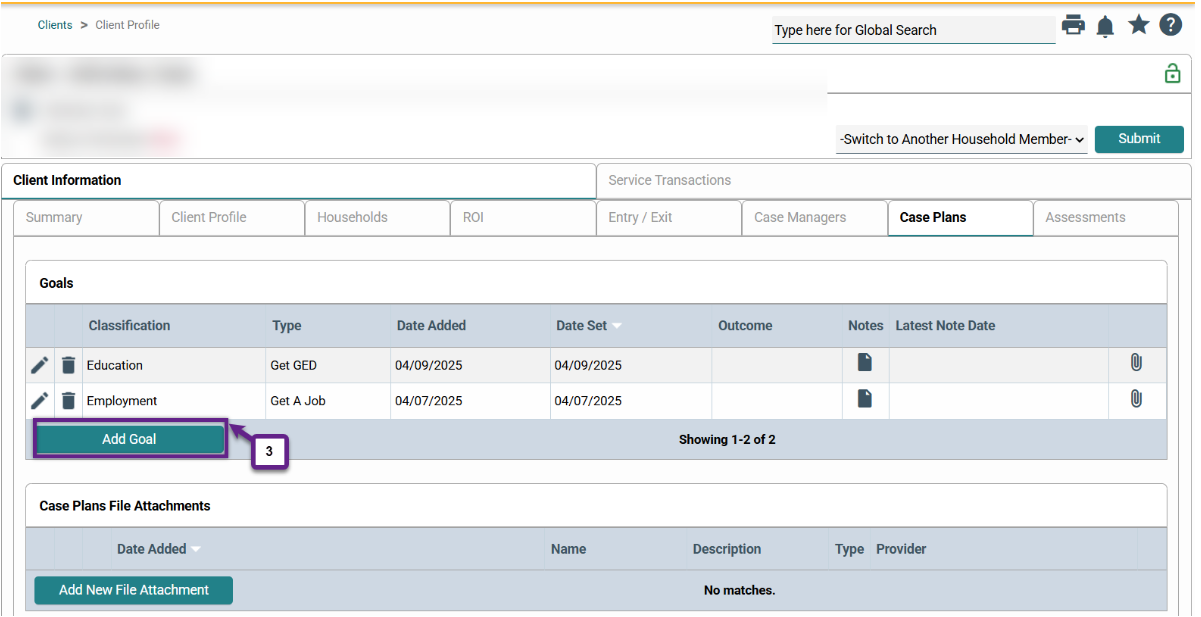
3. Select the “Goals” area and choose “add goal.”
This is where you will add any goals that your client has identified. Goals are the way to organize your case notes, kind of like a tab of a binder. Your agency may have a preference for adding case notes. Please check with your agency for how they would like your notes formatted. Some examples of goals with case notes are:
- Education Goal: client has enrolled in GED courses part-time at Erie Community College for the Spring B semester.
- Employment Goal: client has obtained a position working 20 hours a week at Tim Hortons.
- Maintaining Case Notes Goal: Spoke with client today. They are doing well, remember they have a doctor appointment on Thursday and have transportation arranged.
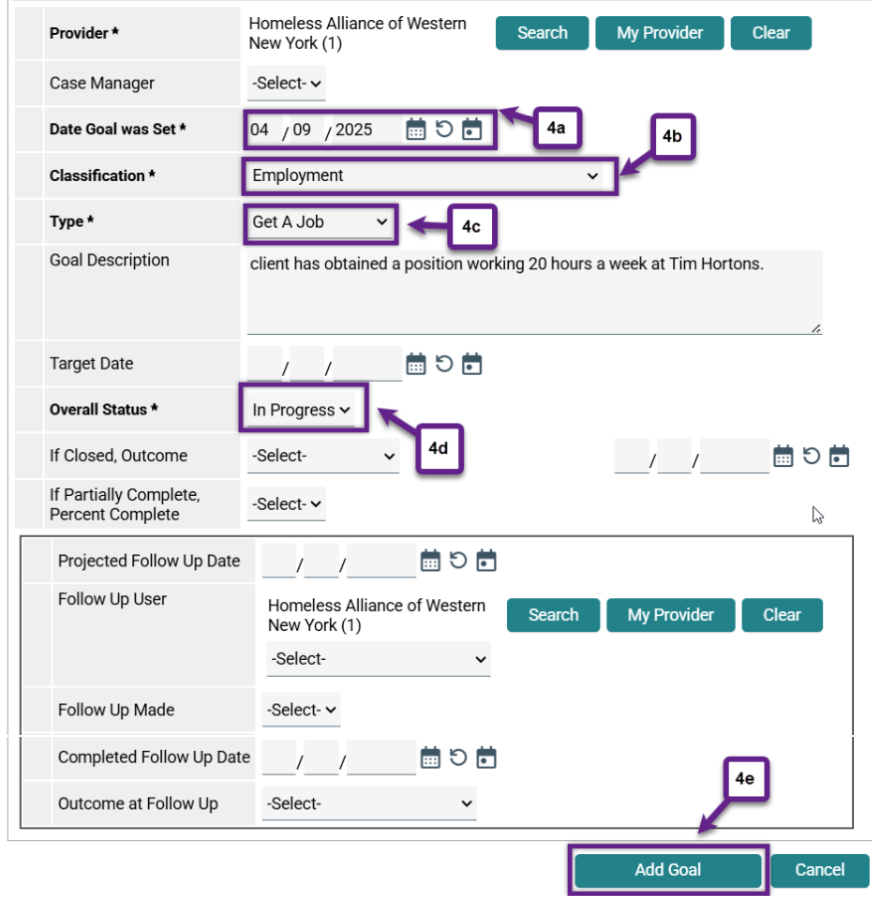
4. Fill in the goal information.
Date Goal was Set (4a), Classification (4b), Type (4c), and Overall Status (4d) are required fields (shown by an asterisk). There are other optional fields such as target date for the goal. Date Goal was Set is the date that the client has identified the goal. Classification is a category for each goal to help organize (think: education, employment, social skills etc.). Type will vary based on which Classification is chosen but generally has more specific options. Overall Status relates to if the goal has been identified, closed, or in progress. Once you complete these fields, click the “Add Goal” button (4e) at the bottom of the screen. Finally, click the “save & exit” button to exit this screen.
5. Once the goal has been set, you will be able to click the “Notes” icon.
This is where you can type any relevant notes related to that specific goal. For example, under an education goal, you may put notes about obtaining a GED through a local community college. This is where you can write quick updates for clients in order to track their progress.
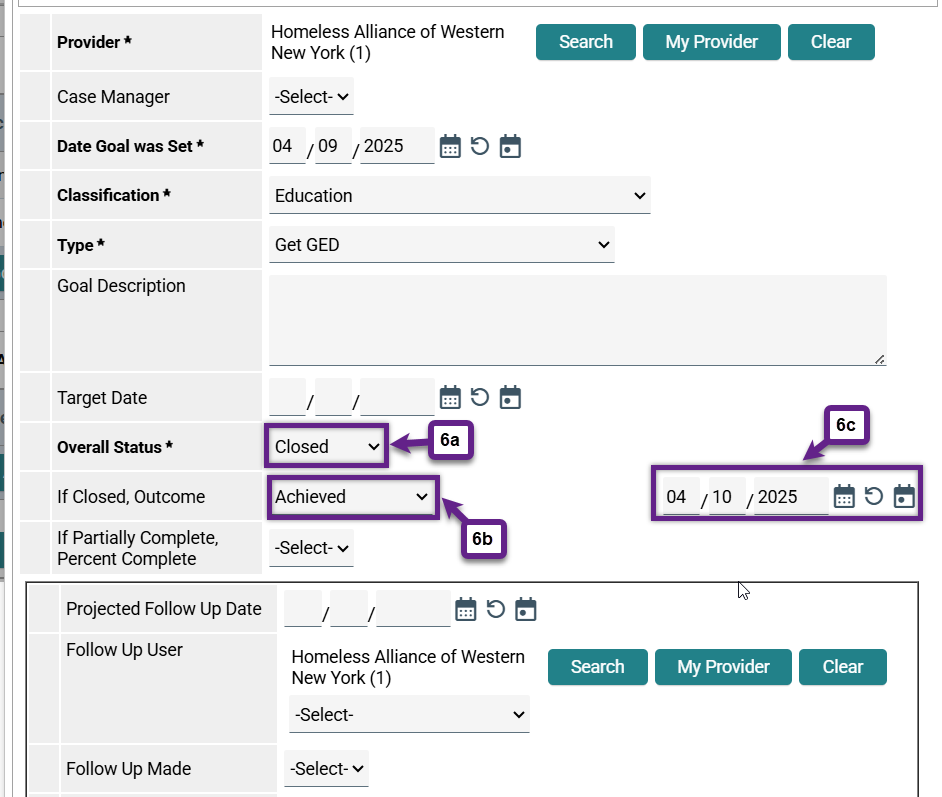
6. When a goal has been met, you can click the pencil icon next to the goal to close it out.
You will need to select “Closed” for the Overall Status (6a) and then select the Outcome for the goal – abandoned, achieved, goal revised, or partially achieved (6b). Then, you will enter the date for the goal closing (6c).
Related Articles
Logging Into HMIS/Resetting Password
Frequently Asked Questions
Where should I put my case notes?
Case notes should go under the Case Plans tab as outlined above. Please do not enter case notes under the “client notes” area, as this area is reserved for general information not associated with case planning such as emergency contact information.
How should I format my case notes?
Your agency may have specific formatting that they use for case notes. Please check with your agency on their preferred format.
What if it isn’t a specific goal that I need to enter?
For goals and notes that don’t fit into one of the specific classifications, you can use the general “maintain case notes” goal.
Who can see my case notes?
Case notes have extra protections and are only visible to people that have access to that particular project. This is different from entries and exits that are visible to anyone in your organization.
Still having trouble?
If you still have questions about using case notes in HMIS, please contact the HMIS Administration Team at [email protected].