Looking for help with HMIS?
When searching for a client within HMIS, there are multiple pieces of information that can be input to aid in the search process. Before creating a new record for a client, you should always confirm that they do not already have an existing record by searching for them. This article will discuss the different aspects involved in searching for a client.
Step by Step Instructions: Searching for a Client Record
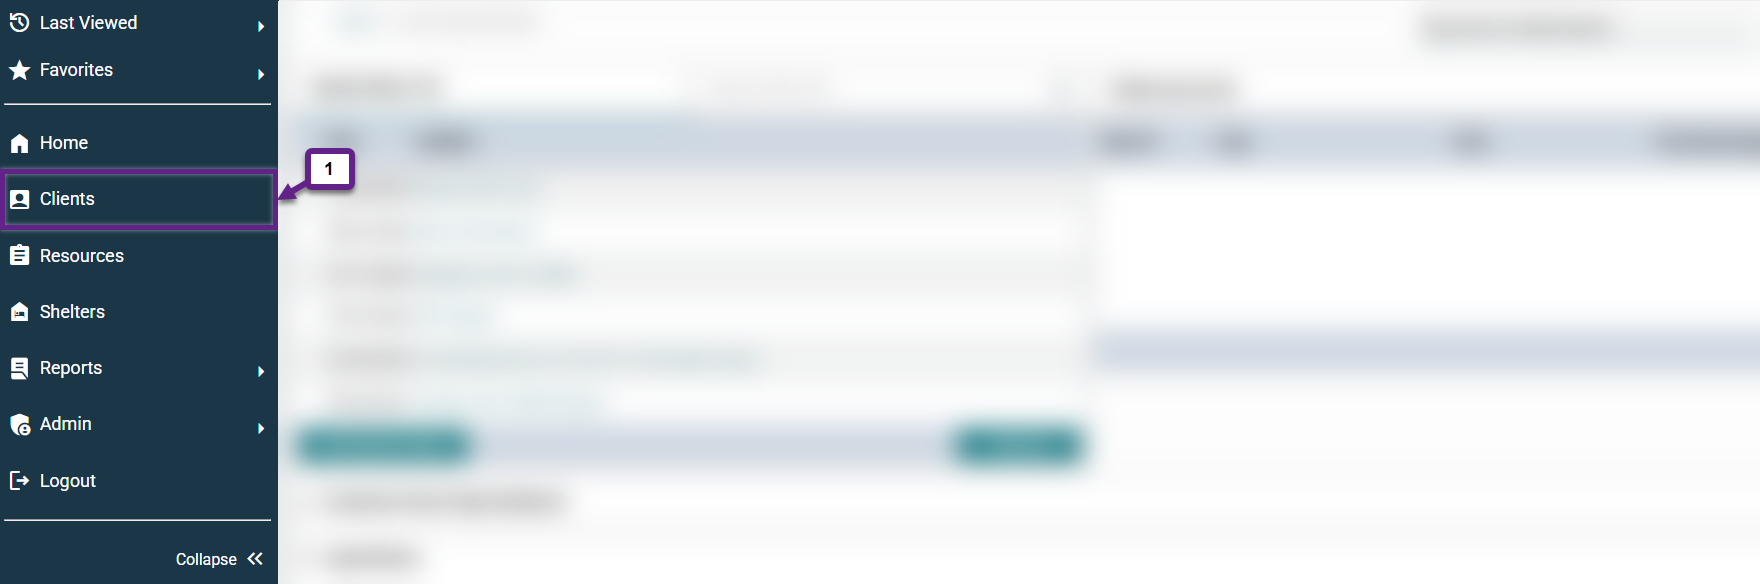
Step 1 – Click the “Clients” tab.
The “Clients” tab is located on the menu on the left side of your screen.
Step 2 – Decide what method to use to search for a client.
There are several ways you can search for a client in HMIS depending on what information is known about them.
The best way to search for a client is by entering their Client ID number into the “Client ID #” search bar (2b).
If the client ID number is unknown, other search options include:
- Name: Enter as much name information as possible (first, middle, last). If any part of their name is unknown, leave that field blank.
- Alias: If the client uses a nickname or any name other than their legal name, it can be entered in this field.
- Social Security Number: The whole social security number can be entered, or only part of it, such as the last four digits.
If you do not know their Client ID, it is usually best to start with a first and last name. If an abundance of results appear, try adding a social security number. If you enter a name and no results appear, try different spellings, or shortening the name. For example, Janye Martina could be shortened to Jan Mart. This allows the system to cast a broader net for potential spelling errors.
Do not click “Exact Match”. Not changing this setting will allow for better capacity to locate a client in the system.
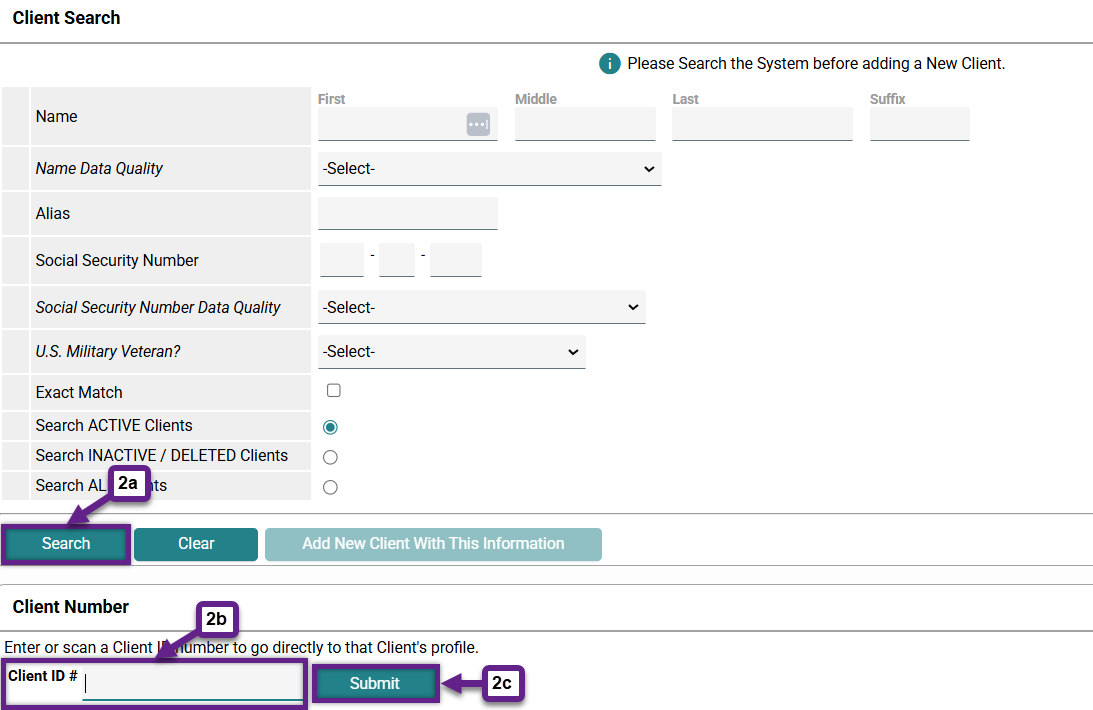
After clicking “Search” (2a) if you entered name, alias, or Social Security Number information, a list of possible matches to client records will appear at the bottom of the screen. If you entered a client ID number and clicked “Submit” (2c), you will be brought directly to the client record page associated with that ID number.
Step 3 – Select the correct client record.
- If a client ID number was searched and is valid, you should automatically be taken to that client’s record after you click “Submit”.
- If you search using name or Social Security Number Information, one or more client records may appear at the bottom of the screen.
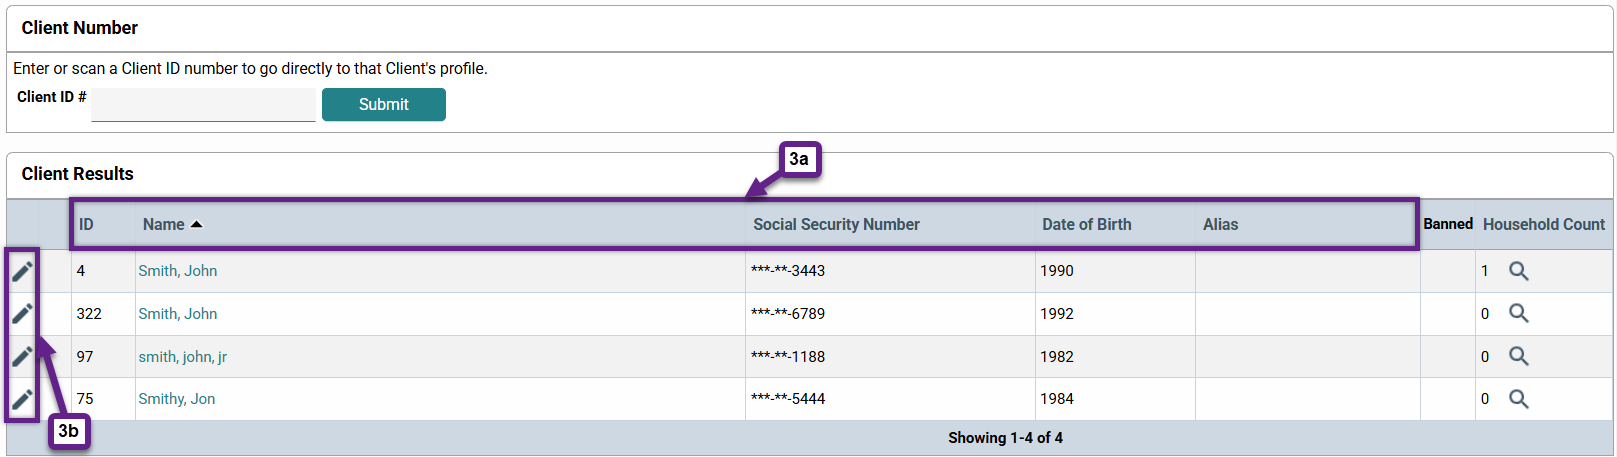
If you searched for a client by any means other than their ID number and multiple client results appear, be sure to cross-check information such as Social Security Number, Date of Birth, and Alias (3a).
Once you have located the correct client, click either their name or the pencil icon (3b) to access their client record.
Step 4 – Create a Client Record (if necessary).
If you completed a thorough search using the steps above to attempt to locate a client profile and still cannot locate the client in the system, you should create a record for the client. For instruction on how to do so, please refer to the article, Creating a Client Record.
Reminder: If a client has an existing record, do not create a new one. Always use the existing record.
Related Articles
Frequently Asked Questions
What if I see more than one client record for the same person?
If this occurs, please contact the HMIS Administration Team at [email protected] to merge the records.
I know that my client is in HMIS, but they do not show up when I search using their ID, why is this?
The client may have had multiple HMIS profiles that have been merged, resulting in a changed ID number. Follow the steps above to search for the client using their name to find their new ID number.
Still having trouble?
If you are still having issues searching for client records, please contact the HMIS Administration Team at [email protected].