Looking for help with HMIS?
Before creating a new record for a client, you should always confirm that they do not already have an existing record by searching for them. This article will discuss how to properly create a client record utilizing best practices.
Step by Step Instructions: Creating a Client Record
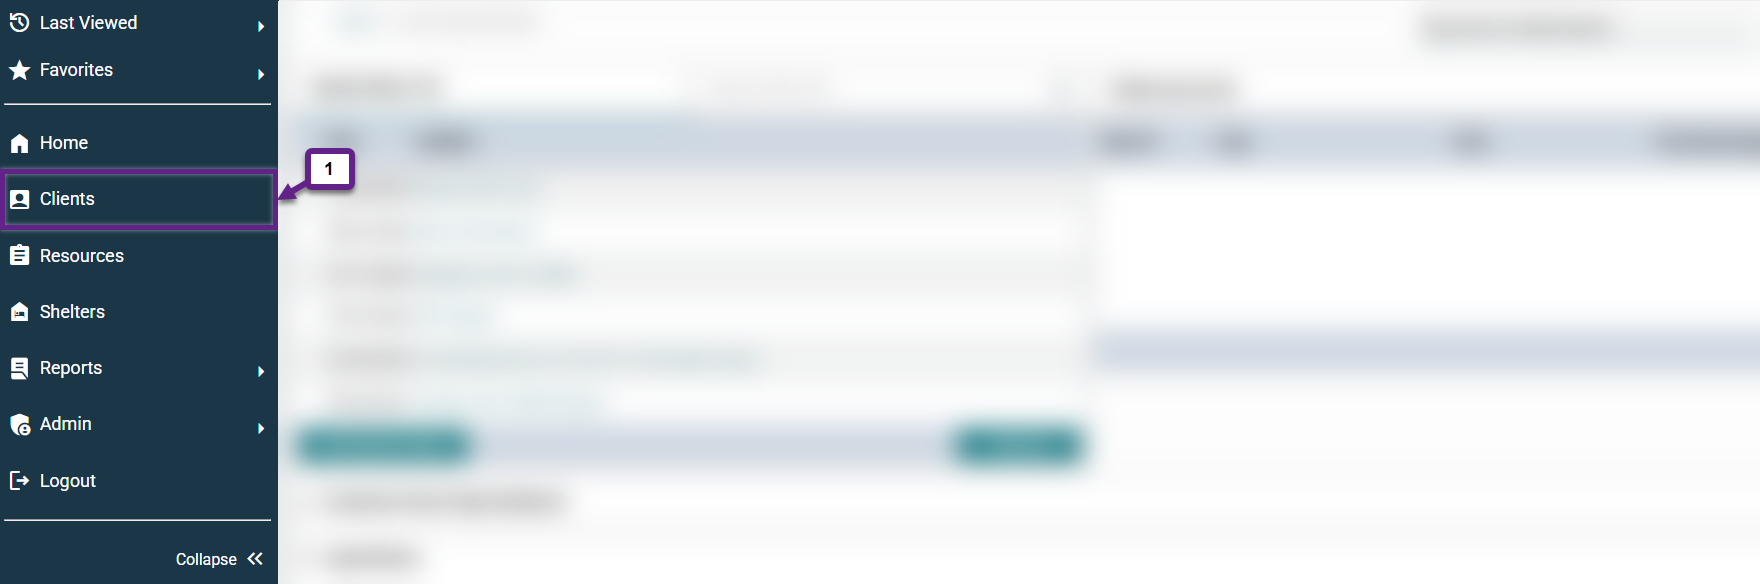
Step 1 – Click the “Clients” tab.
The “Clients” tab is located on the menu on the left side of your screen (1).
Step 2 – Confirm that the client does not already have a client record.
Follow the steps described in the Searching for a Client Record article to check for an existing client record. Duplicate client records are problematic for numerous reasons and are easily preventable through a quick confirmation.
Step 3 – Enter client information where prompted.
Not all of the following information about the client is required, but it is important to enter as much information as possible.
The Data Quality fields should be filled out according to the information entered, regardless of the response or lack thereof. They are key pieces of HMIS data related to keeping track of clients which has implications for assessing services and funding. If any data quality fields are not filled in, they will show as an error in reports.
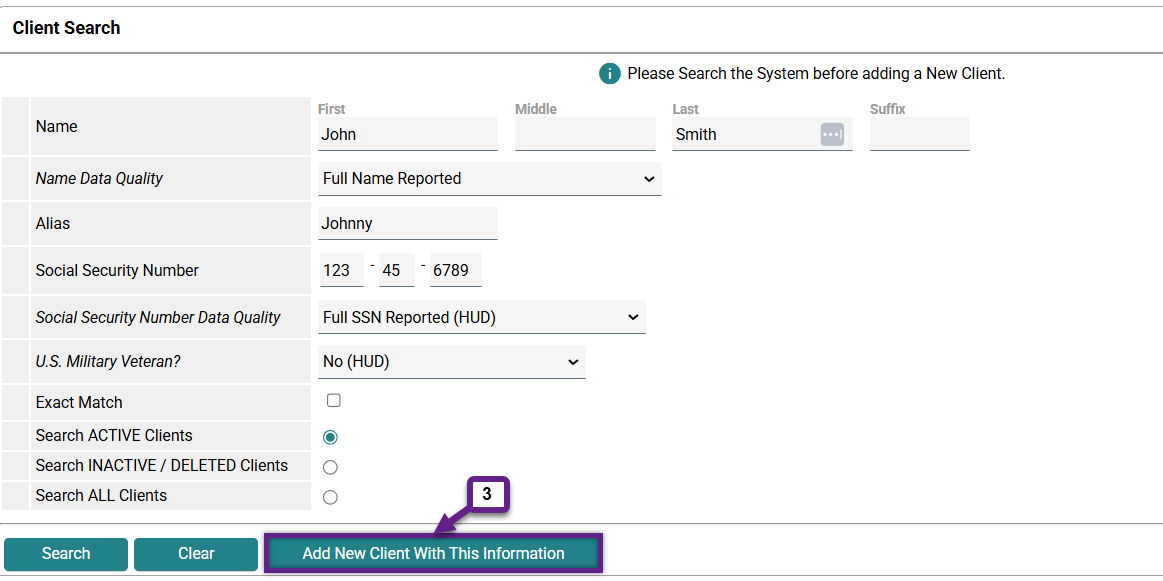
Note: The client has the right to decline to provide any of this information for any reason. Doing so will not affect their eligibility for services.
- Name – Enter as much of the client’s name as is known, being sure to input the correct spelling.
- Name Data Quality – Select the appropriate response from the drop-down menu.
- Alias – If the client has an alias that would be helpful in identifying them, enter it here. If this does not apply to the client, leave it blank.
- Social Security Number – Enter as much of the client’s social security number as is known. If the client only knows the last four digits, enter only the last four digits in correct placement.
- Social Security Number Data Quality – Select the appropriate response from the drop-down menu.
- U.S. Military Veteran – Select the appropriate response from the drop-down menu.
Once all of the information has been entered, click “Add New Client With This Information” (3). If you did not already search for the client, the button will be dimmed in color and will not be able to be clicked until you do so.
Related Articles
Requesting Client Name or Social Security Number Changes
Frequently Asked Questions
Do I need to create a client record for each family member served?
Yes, each individual family member must have their own client record, including children. Family members can be linked together within HMIS through the creation of a household. See Adding and Editing Households for more information.
What if I see more than one client record for the same person?
If this occurs, please contact the HMIS Administration Team at [email protected] to merge the records.
I know that my client is in HMIS, but they do not show up when I search using their ID, why is this?
The client may have had multiple HMIS profiles that have been merged, resulting in a changed ID number. Follow the steps described in the Searching for a Client Record article to search for the client using their name to find their new ID number.
Still having trouble?
If you are still having issues creating client records, please contact the HMIS Administration Team at [email protected].