Looking for help with HMIS?
This article explains the steps involved in adding a project entry, including using Back Date Mode and Enter Data As, locating the Entry/Exit tab, and linking household members to a specific entry. For guidance on how to complete an Entry Assessment, please refer to the Master Workflow article for your project type.
Step by Step Instructions: Adding a Project Entry
Step 1 – Use Back Date Mode and Enter Data As (if necessary).
Use Back Date Mode if the project entry occurred any day before the present day. Use Enter Data As to enter data under the appropriate project.
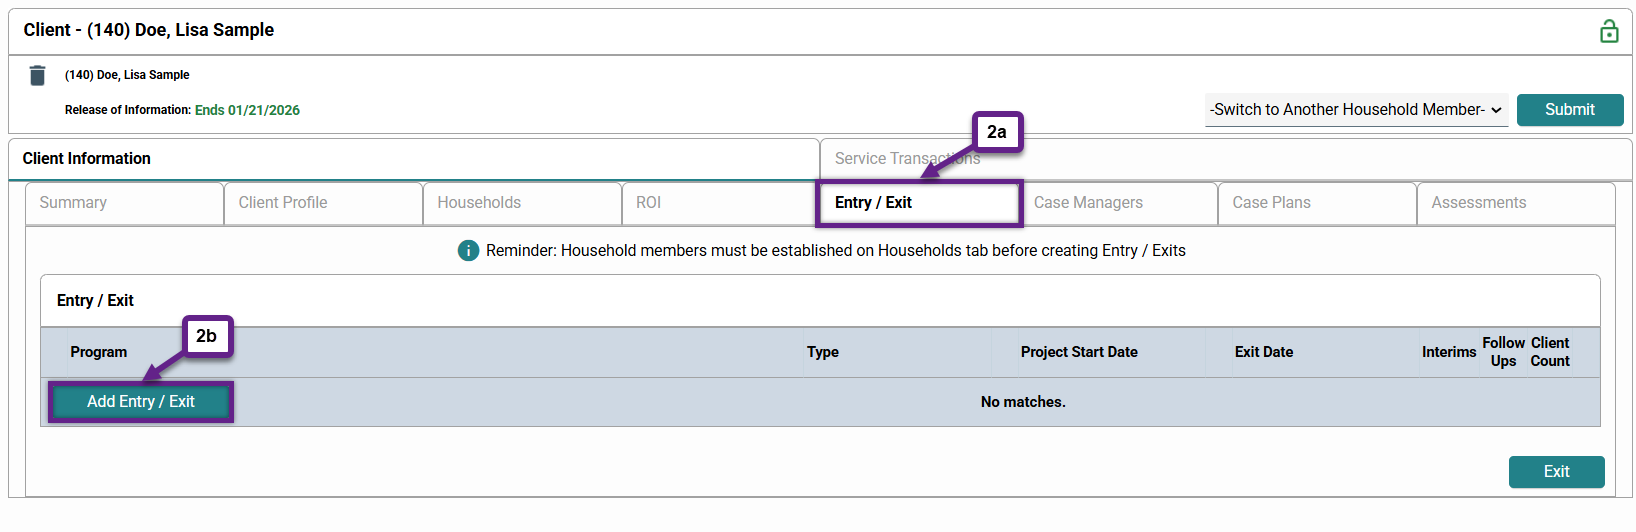
Step 2 – Go to the record of the client that needs to be added to a project.
Click the “Entry/Exit” tab (2a) along the Client Information banner, then click “Add Entry/Exit” (2b).
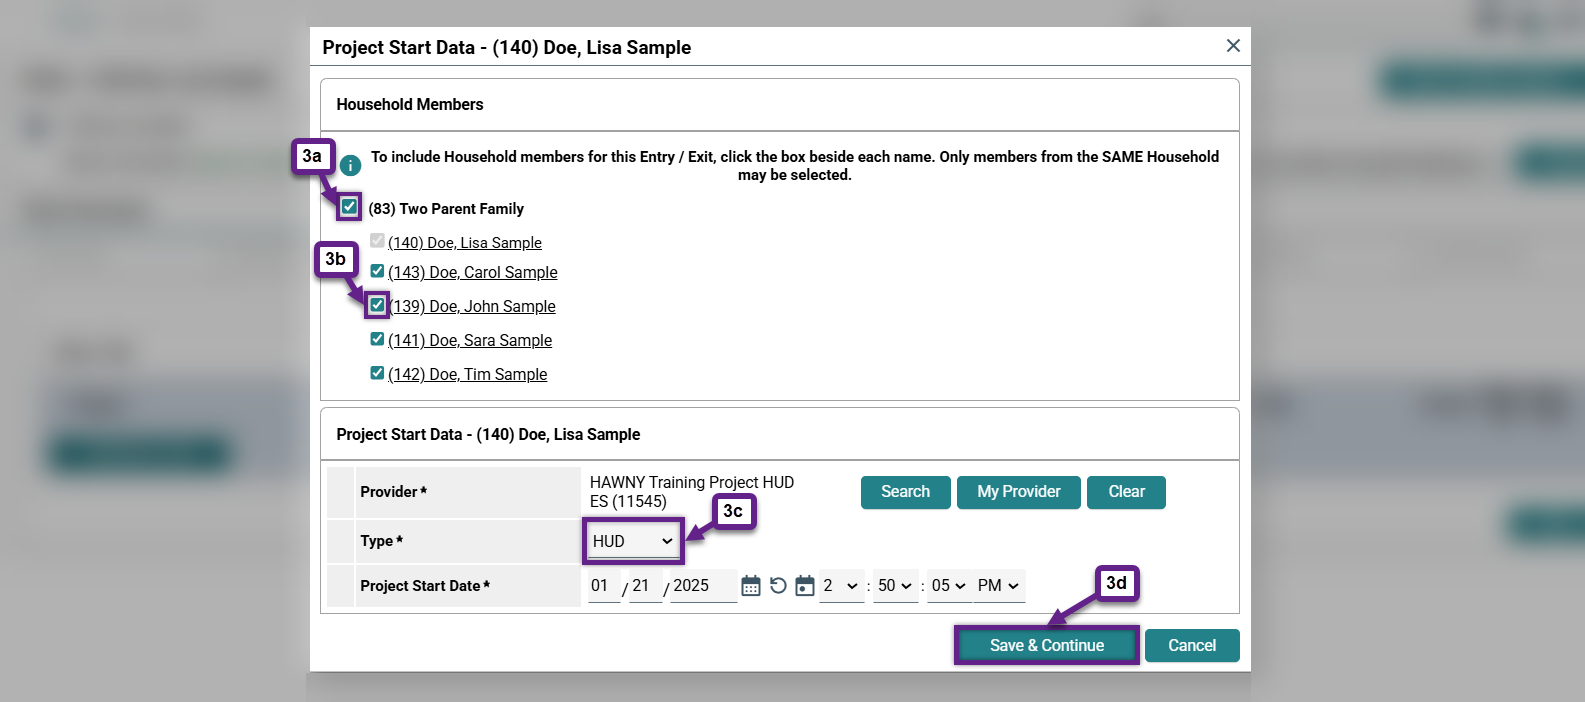
Step 3 – Enter the project start data.
A new window will open prompting you to fill out information about the project entry.
- Household Members – If the client is part of any households, other household members will appear in this box. Check the box for the entire household (3a) if every member of the household is entering the project. If only some of the household members are being entered, select the box(es) next to their name(s) (3b). For information on how to add or edit a household, see Adding and Editing Households.
- Provider – This field should automatically be filled in correctly if using Enter Data As. Do not change the provider on this screen.
- Type – Select the appropriate project type from the drop-down menu (3c). PATH, RHY, and VA funded projects use those Entry/Exit types. All other projects use HUD Entry/Exits.
- Project Start Date – The date should automatically be filled in as either the date entered into Back Date Mode or the current date. Do not change the date on this screen.
Click “Save and Continue” once all information has been entered (3d). The entry has officially been created. You will be taken to the Entry Assessment screen to provide more data about the client(s). For guidance on how to complete an Entry Assessment, please refer to the Master Workflow article for your project type and/or Creating HUD Verifications. Links can be found in the Related Articles section at the bottom of this article.
Related Articles
Switching Between Projects (Enter Data As)
Changing the System Date (Back Date Mode)
Rapid Re-housing Project Workflow
Emergency Shelter Project Workflow
Permanent Supportive Housing Project Workflow
Transitional Housing Project Workflow
Homelessness Prevention Workflow
Frequently Asked Questions
What if a member of the household who needs to be entered into a project is not listed on the Project Start Data screen?
This means that the member has not been officially added to the household. You will need to go to the “Households” tab and add them. For information on how to add or edit a household, see Adding and Editing Households.
Still having trouble?
If you are still having issues adding a project entry, please contact the HMIS Administration Team at [email protected].