Looking for help with HMIS?
Adding Interim Reviews (Updates and Annual Assessments)
This article will discuss how to add Interim Reviews. These include 30, 60, 90, and 120 Day Reviews as well as Annual Assessments and Updates. Interim Reviews should be created when you have communication from a client that there has been a change to their monthly income, non-cash benefits, insurance, or disability status. Annual Assessments, a type of Interim Review, are required to be completed once a client reaches the date marking their one-year anniversary of participation in a project. RRH and PSH projects should use an Interim Review to enter a Housing Move-in Date.
Step by Step Instructions
Step 1 – Use Enter Data As and Back Date Mode (if necessary).
If you have access to multiple projects within HMIS, use Enter Data As to work under the appropriate project. Use Back Date Mode to enter data that occurred or became known at any date prior to today.
Step 2 – Add an Interim Review to an Entry/Exit.
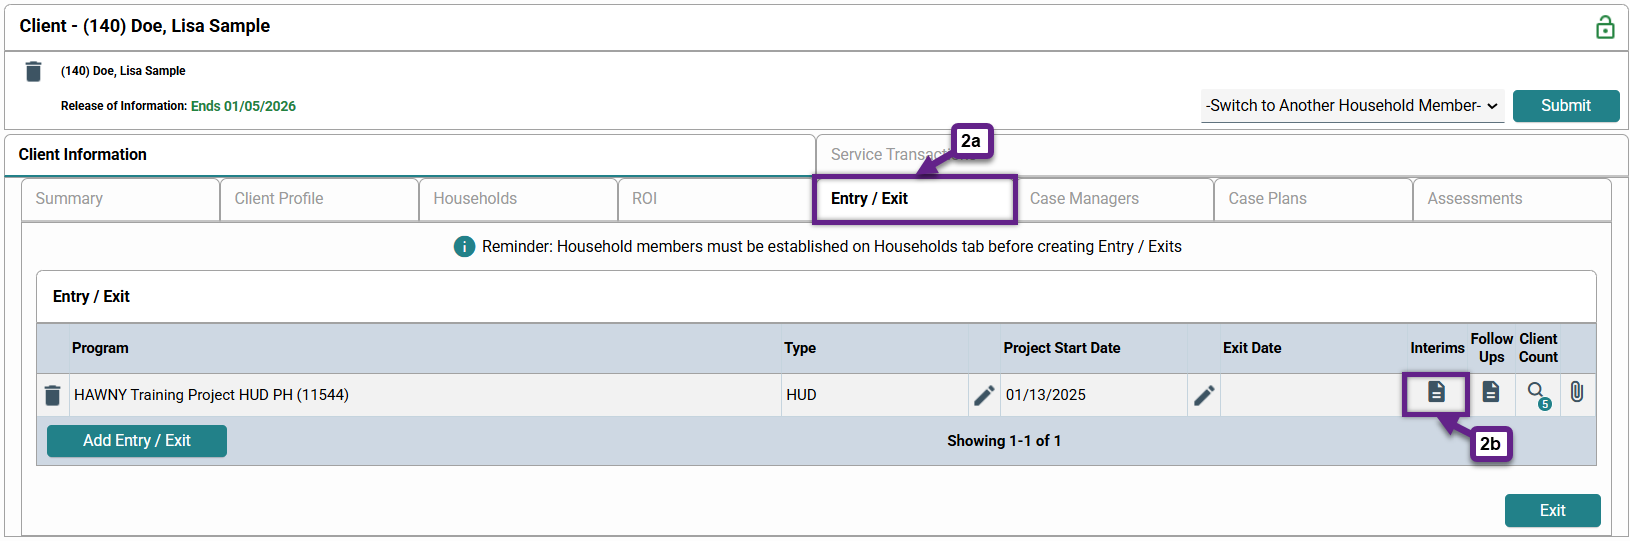
- Go to the Entry/Exit tab of the client who needs an Interim Review (2a).
- Click the paper icon underneath where it says “Interims” for the project entry (2b).
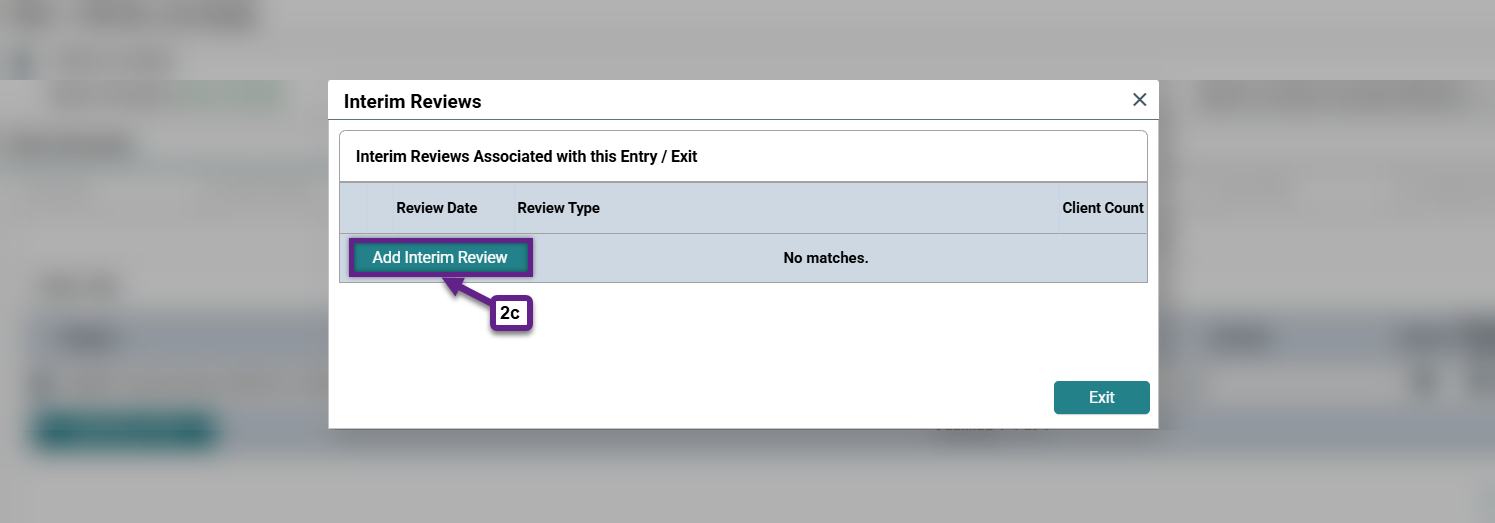
- A new window will open. If there are existing Interim Reviews, they will show up here. To add a new one, click “Add Interim Review” (2c).
Step 3 – Fill out the Add Interim Review window.
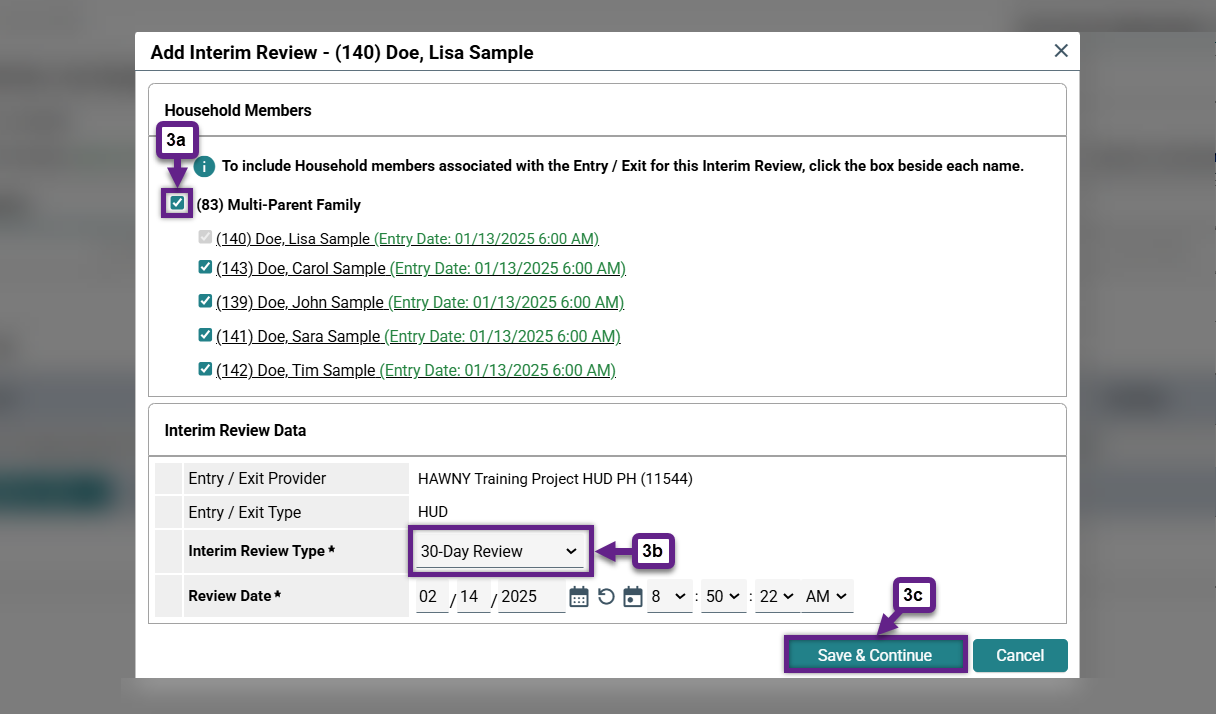
- Household Members – Select the checkbox next to the family to include all members of the Household/Entry (3a).
- Interim Review Type – Select the type of Interim Review from the drop-down menu (3b).
- Review Date – This will auto-populate as the current date or the date you entered in Back Date Mode.
Click “Save and Continue” when done (3c). You will be taken to the Interim Review Assessment.
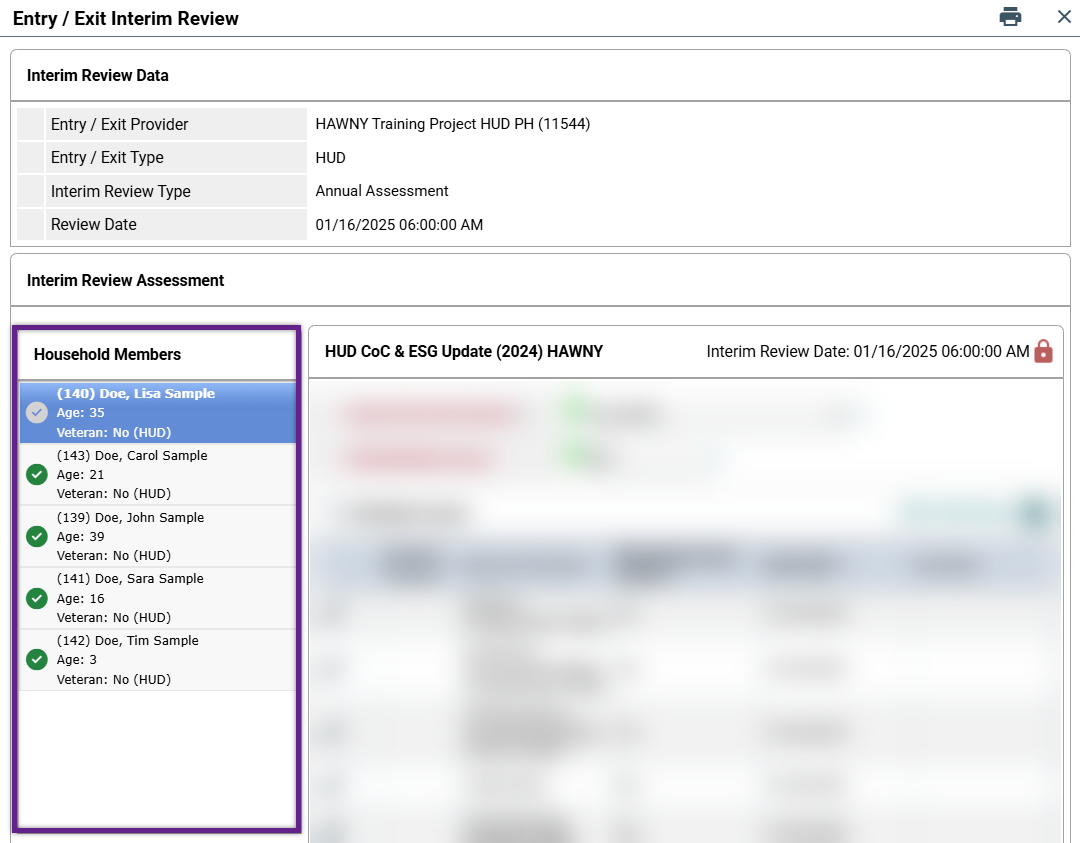
Step 4 – Complete the Interim Review Assessment.
Document any changes to each individual within the household/entry. You can easily switch between individuals using the panel on the left side of the screen. For information on how to properly document changes to HUD Verifications, see Updating HUD Verifications. For guidance on how to document changes to income specifically, see Updating Income, and follow the steps described there within the interim review.
RRH & PSH projects should document a Housing Move-in Date when prompted within an interim review.
Once you have completed the assessment, click “Save and Exit” at the bottom of the window.
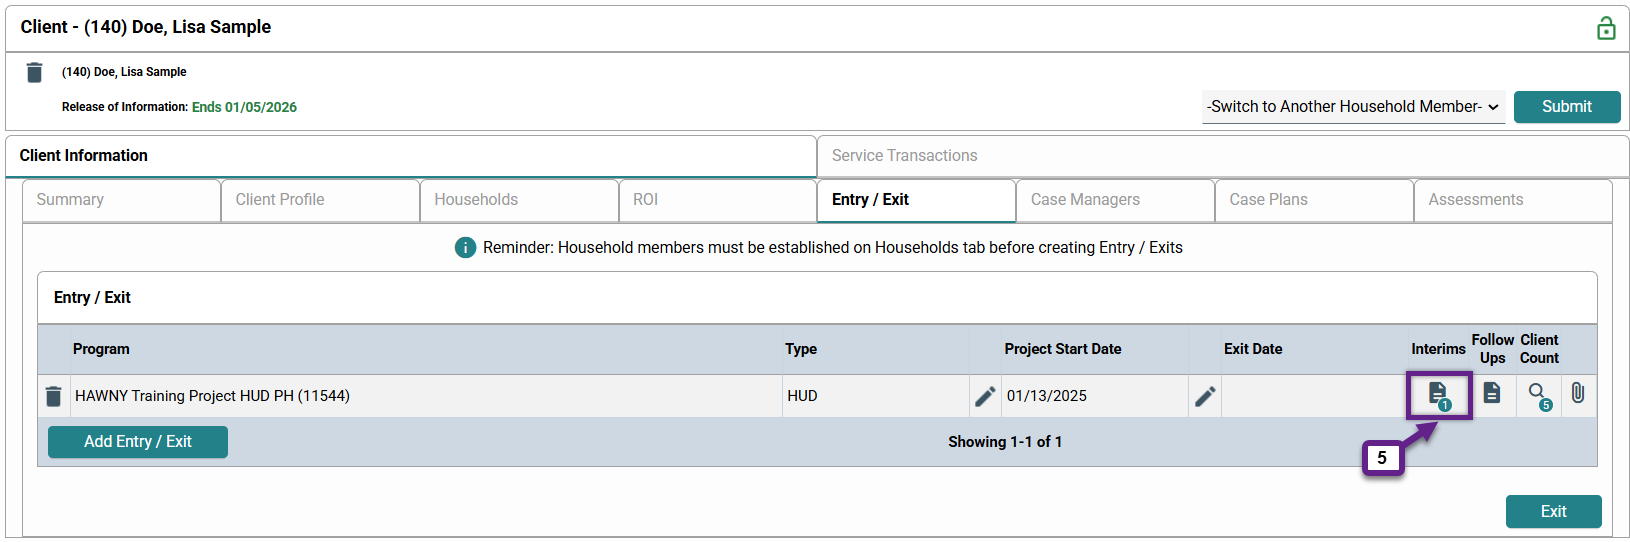
Step 5 – Confirm the Interim Review has been added and saved.
You can see that your interim review has been added and saved in two different ways.
- A number should appear (or should increase by one) next to the paper icon under the Interims column (5).
- You can click on the paper icon (5) to view the interim review.
Related Articles
Changing the Date (Back Date Mode)
Switching Between Projects (Enter Data As)
Adding a Housing Move-in Date (HMID)
Frequently Asked Questions
When do I need to complete an Interim Review in HMIS?
Interim reviews should be created when you have communication from a client that there has been a change to their monthly income, non-cash benefits, insurance, or disability status. Annual Assessments, a type of interim review, are required to be completed once a client reaches the date marking their one-year anniversary of participation in a project. RRH and PSH projects should use an interim review to enter a Housing Move-in Date.
Still having trouble?
If you are still having issues adding Interim Reviews, please contact the HMIS Administration Team at [email protected].