Looking for help with HMIS?
Adding a Project Exit
This article explains the steps involved in exiting clients from a project. It is important to remember to exit all household members, select a destination, and update any information within the Exit Assessment.
Step by Step Instructions
Step 1 – Use Enter Data As and Back Date Mode (if necessary).
If you have access to more than one project in HMIS, use Enter Data As to select the appropriate project.
If the data you are entering was collected or occurred prior to the current date, use Back Date Mode to select the proper date.
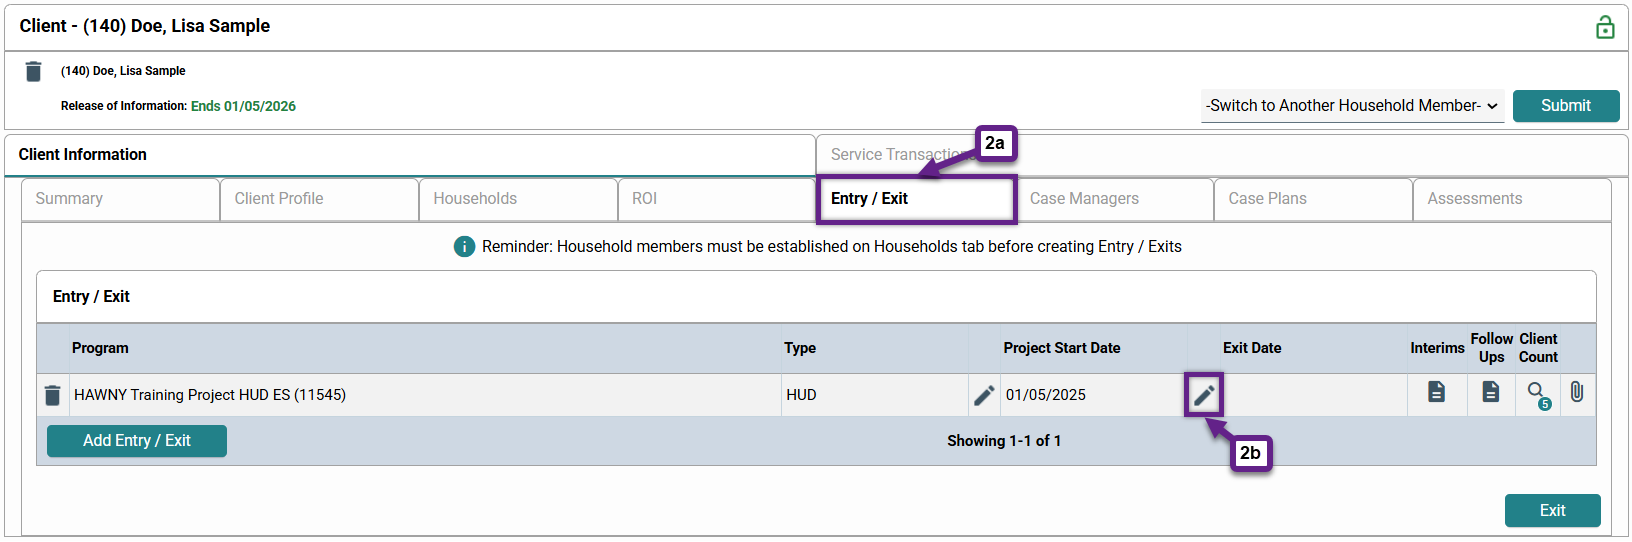
Step 2 – Go to the Entry/Exit tab of the client that needs to be exited.
Click the “Entry/Exit” tab along the Client Information banner (2a), then, click the pencil icon underneath the Exit Date Column (2b) to add an exit date.
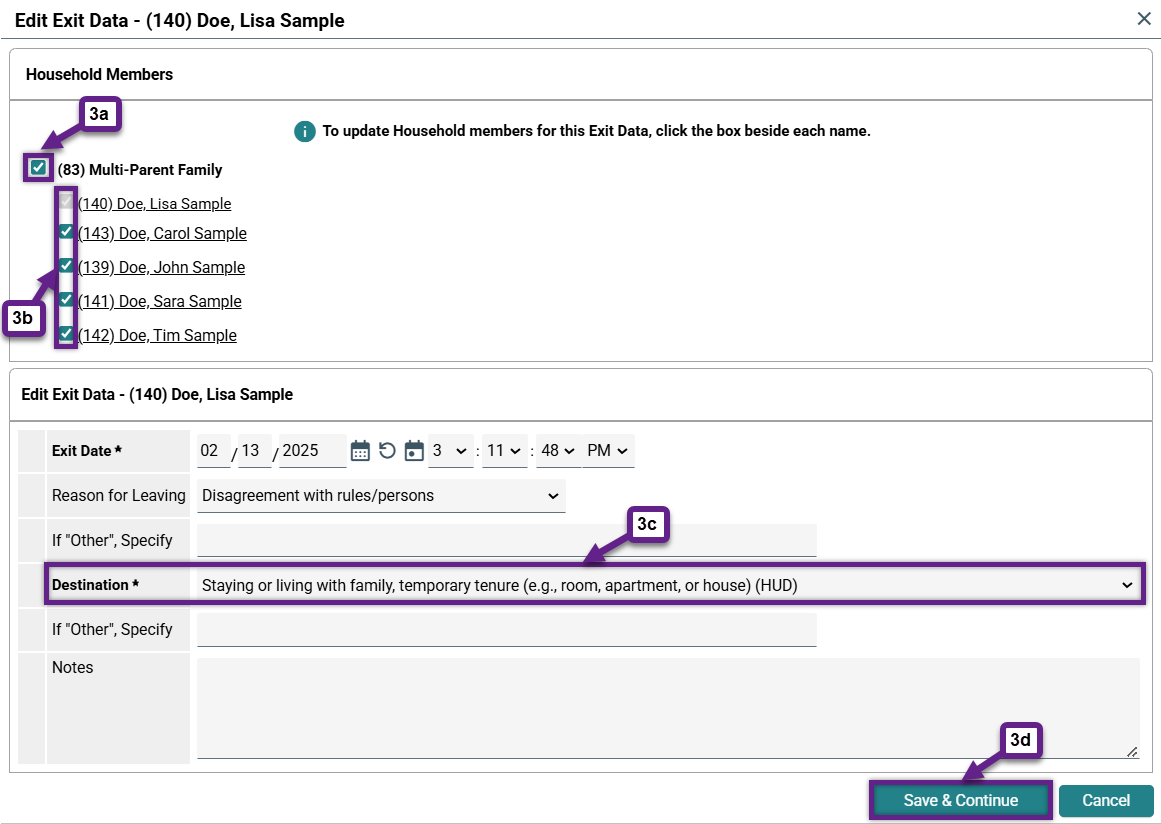
Step 3 – Fill in the exit data.
- Household Members – Select the household box (3a) if all of the household members are exiting. If only certain members of the household are exiting, select only their individual boxes (3b), leaving the boxes of the individuals who will remain in the project unchecked.
- Exit Date – This should automatically be filled in as either the current date or the date that you are backdated to.
- Reason for Leaving – Select the appropriate response from the drop-down menu. Keep in mind that if you are unsure, there is an “Unknown” option within the menu.
- If “Other”, Specify – If you answered “other” for the previous question, explain using this space.
- Destination – Select the appropriate response from the drop-down menu (3c).
- If “Other”, Specify – If you answered “Other” for the previous question, explain using this space.
- Notes – Use this space to provide any additional information regarding the clients’ exit that would be useful to have recorded.
Note: Not all of these fields are required, but it is helpful to fill in as much information as possible. Fields marked with an asterisk (*) are required.
Click “Save and Continue” once all information has been entered (3d). The exit has officially been created. You will be taken to the Exit Assessment screen to provide updated information about the client(s).
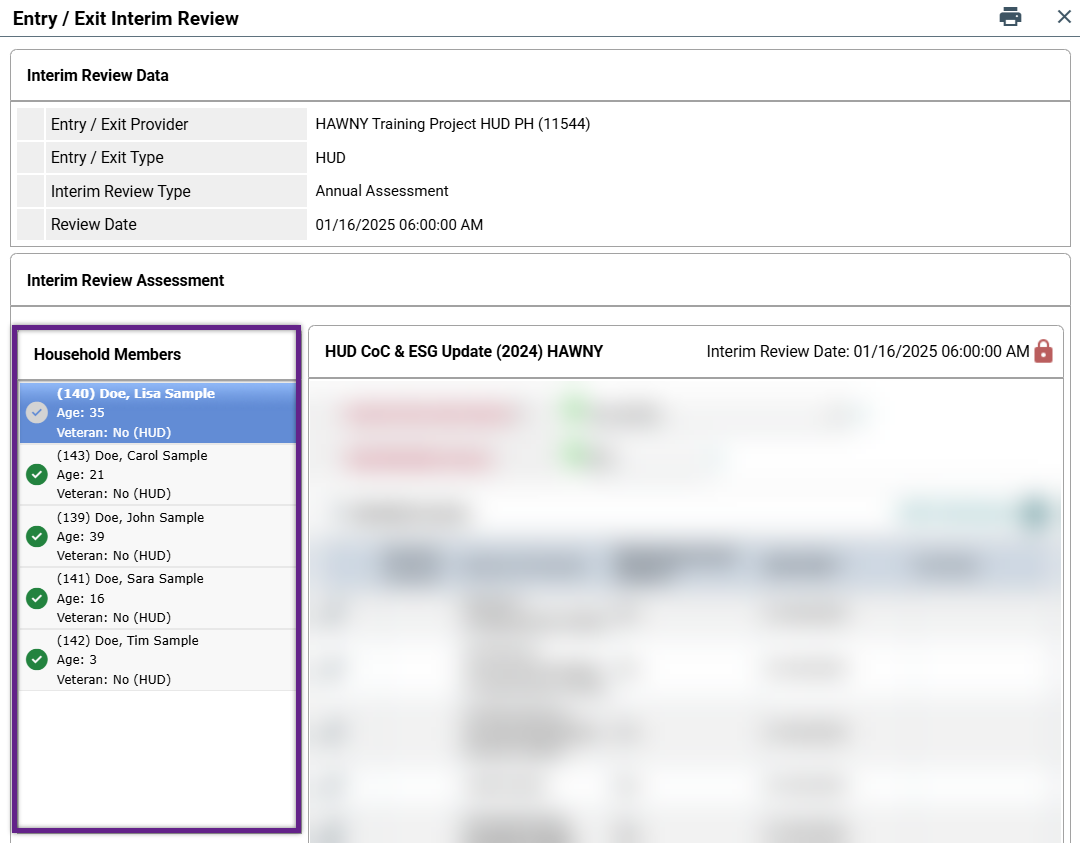
Step 4 – Complete the Exit Assessment (if applicable).
Not every project requires an Exit Assessment. If your project does not require one, it will not appear in the new window. You can click “Save and Exit” without any further action and the exit will be complete.
If your project does require an Exit Assessment, it will appear on screen after clicking “Save and Continue” on the previous screen. Make any necessary changes for every household member of the exit. You can easily switch between household members using the panel on the left of the screen.
For information on how to properly document changes to HUD Verifications, see Updating HUD Verifications. For guidance on how to document changes to income specifically, see Updating Income, and follow the steps described there within the interim review.
Once any changes have been made, click “Save and Exit” at the bottom of the window.
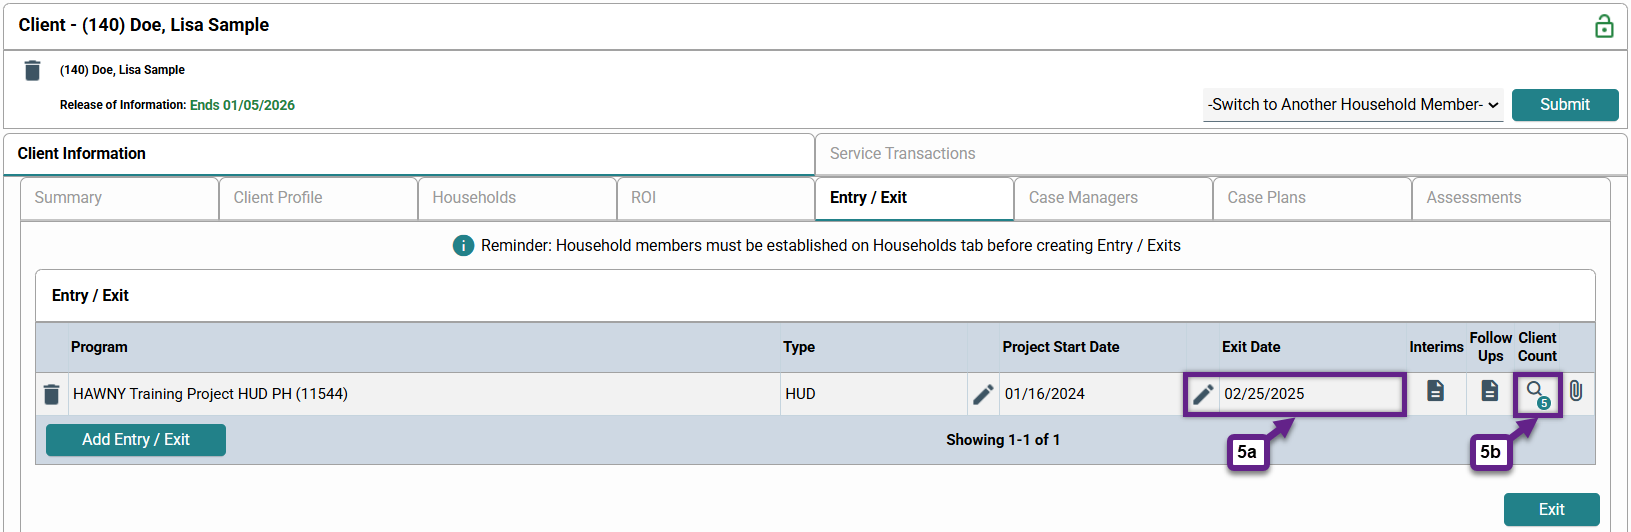
Step 5 -Confirm the successful exit of all clients.
If you have successfully exited the client, the date of the exit will appear underneath the “Exit Date” column (5a).
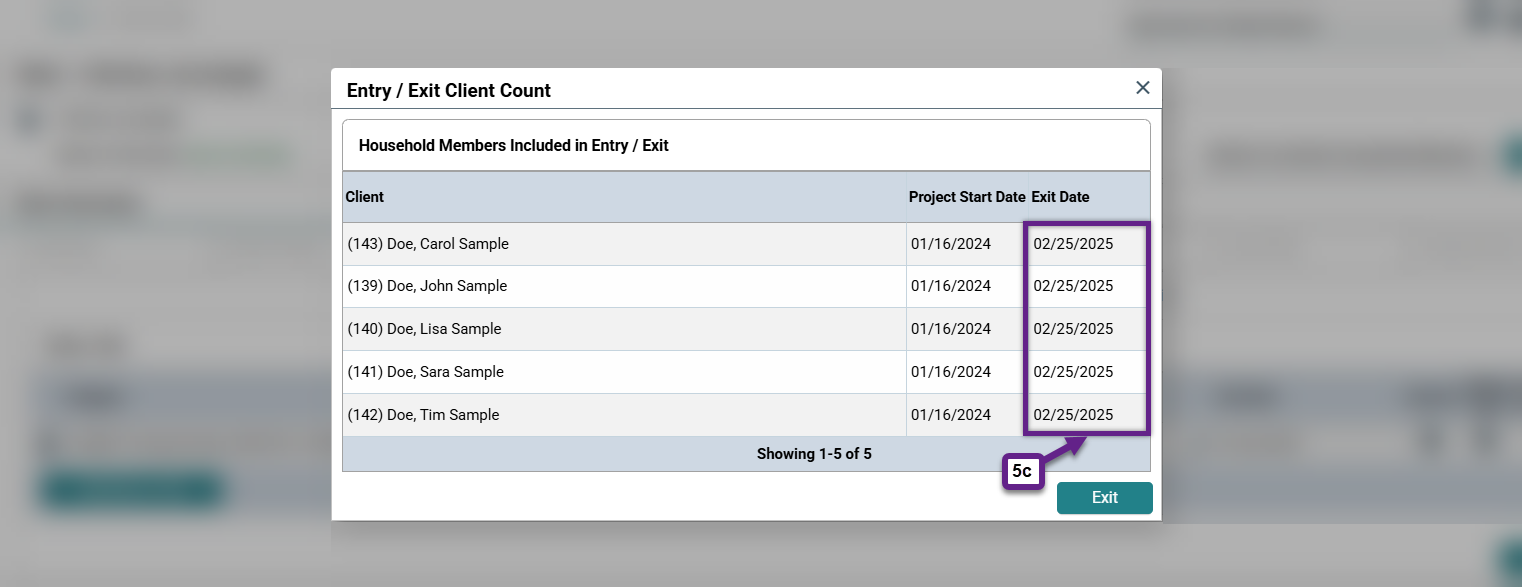
To check if all of the household members (or which of the household members) have been exited, click the magnifying glass on the far right (5b). This will allow you to see the entry and exit date for each household member. If the individual has been exited, a date will appear for their row under the “Exit Date” column.
If an individual has not been exited, their space in the Exit Date column will be blank. Household members may be missing an exit date if you forget to select either the checkbox next to their name or the household checkbox in “Step 3 – Fill in the exit data” section of this article.
Related Articles
Changing the Date (Back Date Mode)
Switching Between Projects (Enter Data As)
Adding a Housing Move-in Date (HMID)
Frequently Asked Questions
What should I do if not all of the household members are exiting the project at the same time?
A household with the same project entry can have different exit dates. If some of the members of the household are remaining in the project while other members are exiting the project, do not select the checkbox next to the name of the clients who will remain in the project. Only those selected will be exited. When it comes time for the remaining members to be exited, select only their checkboxes, and fill in the appropriate information.
How do I know when to exit a client from a Street Outreach project?
Case Managers should make every attempt to conduct exit interviews with their clients to get an accurate picture of where they will be living moving forward, also known as the Destination. Exiting clients from the SO project will not remove them from the By-name list for as long as they are enrolled in the Coordinated Entry (CE) HMIS Project.
What should you use for the Exit Date?
- If there has been no contact with the client in the last 60 days… use Back Date Mode to exit the client 30 days after the last date of contact.
- If the client has left the area or communicates they are leaving the project… use the date you received this information as the exit date.
- If the client has moved into permanent housing… use the Move-in Date as the exit date.
Still having trouble?
If you are still having issues exiting clients, please contact the HMIS Administration Team at [email protected].