Looking for help with HMIS?
Updating HUD Verifications
In this article, we will review how to update Monthly Income, Non-Cash Benefits, Health Insurance, and Disabilities information for clients in the Homeless Management Information System (HMIS). These are known in our HMIS as HUD Verifications (however your organization probably doesn’t use this term day-to-day).
Things to Know
HUD Verifications Format
There are four types of HUD Verifications that may be displayed on your project’s assessments (Entry, Interim Review, or Exit), depending on your funder requirements.
- Monthly Income
- Non-Cash Benefits
- Health Insurance
- Disabilities
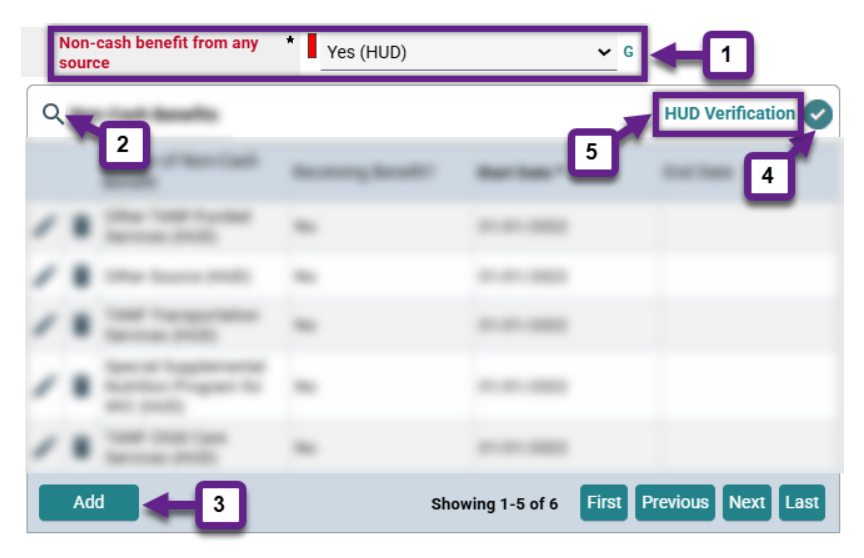
Each box has the same basic format:
- Overall Yes/No: This question indicates whether or not the client is receiving income or non-cash benefits, if they are covered by health insurance, or if they have a disabling condition.
- View All Shortcut: This magnifying glass icon is useful for reviewing and editing the existing records/rows within the HUD Verification box. Clicking it will expand the HUD Verification box into a large pop-up window where you can see up to 20 records/rows at a time.
- Add Row: Use this button to create a new record (we will call this a row) for a Type (Source of Income, Source of Non-Cash Benefit, Health Insurance Type, or Disability Type). You will do this if a Type is missing or if there has been a change to a Type.
- HUD Verification Status: This icon will either be a teal check mark or a red triangle. A red triangle indicates that there is a missing or incomplete Type. A check mark indicates that all Types have an Open Row . There should be an Open Row for every Type, even ones the client doesn’t have.
- HUD Verification Shortcut: Use this link to open a pop-up window that displays all possible Types for the HUD Verification and clearly identifies which Type is missing or incomplete.
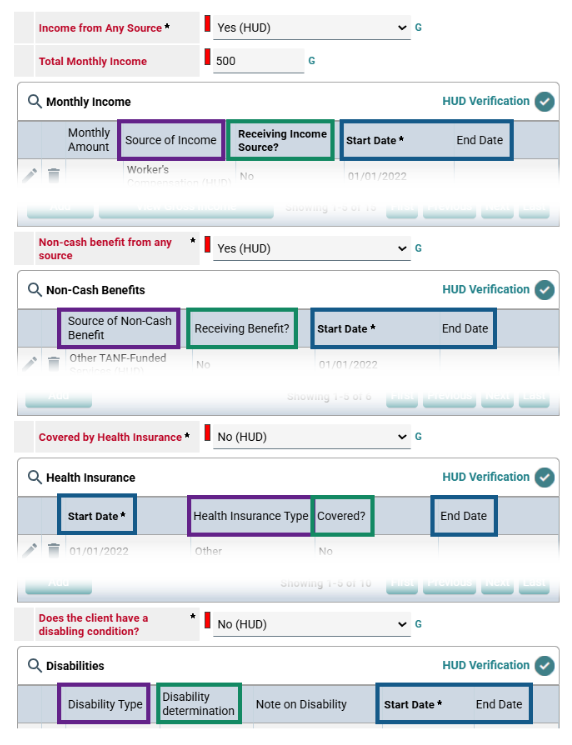
Each row has the same basic information:
- Type: The label for this field is different in each of the HUD Verifications so we will call this field “Type” for this article. For Monthly Income this is “Source of Income,” for Non-Cash Benefits this is “Source of Non-Cash Benefit,” for Health Insurance this is “Health Insurance Type,” and for Disabilities this is “Disability Type.”
- Determination: Like Type, the label for this field is different in each of the HUD Verifications so we will call this field “Determination” for this article. For Monthly Income this is “Receiving Income Source?,” for Non-Cash Benefits this is “Receiving Benefit?,” for Health Insurance this is “Covered?,” and for Disabilities this is “Disability determination.”
- Start and End Dates: Every row will have a Start Date and End Date field but the End Date will only be completed if there has been a change to that Type.
Note: Some HUD Verification Transaction boxes may have additional information.
System Date
The System Date is either today’s date or the date you have set the system to by using Back Date Mode.
Open Row within HUD Verification Transaction Box
An Open Row is a row within the HUD Verification Transaction Box where the System Date:
- Is on or after the Start Date and there is no End Date, or
- falls within the Start Date and End Date.
Step-by-Step Instructions
Before making any changes to your client’s HUD Verifications, make sure you are using Enter Data As and Back Date Mode, if needed.
Step 1 – Create an Interim Review.
When your client informs you of a change to their Monthly Income, Non-Cash Benefits, Health Insurance, or Disability information while they are still receiving services by your project, you will need to create an Interim Review (Update) to document that change in HMIS. If you need instructions for creating an interim review use the link in the Related Articles section below.
Step 2 – Find the HUD Verification that needs to be updated.
Once in the Interim Review, scroll down to the HUD Verification that needs to be updated. The following steps to update the HUD Verification information are the same for every HUD Verification type. Monthly Income does have additional steps related to the amount of income the client is receiving, please use the link in the Related Articles section below for detailed instructions on updating income.
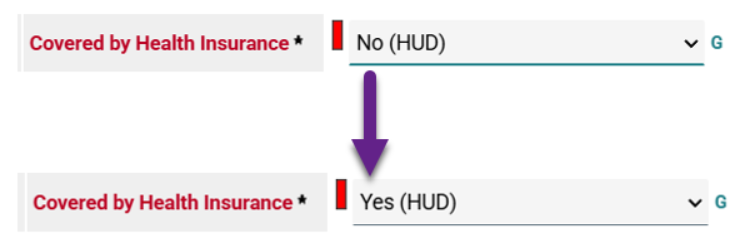
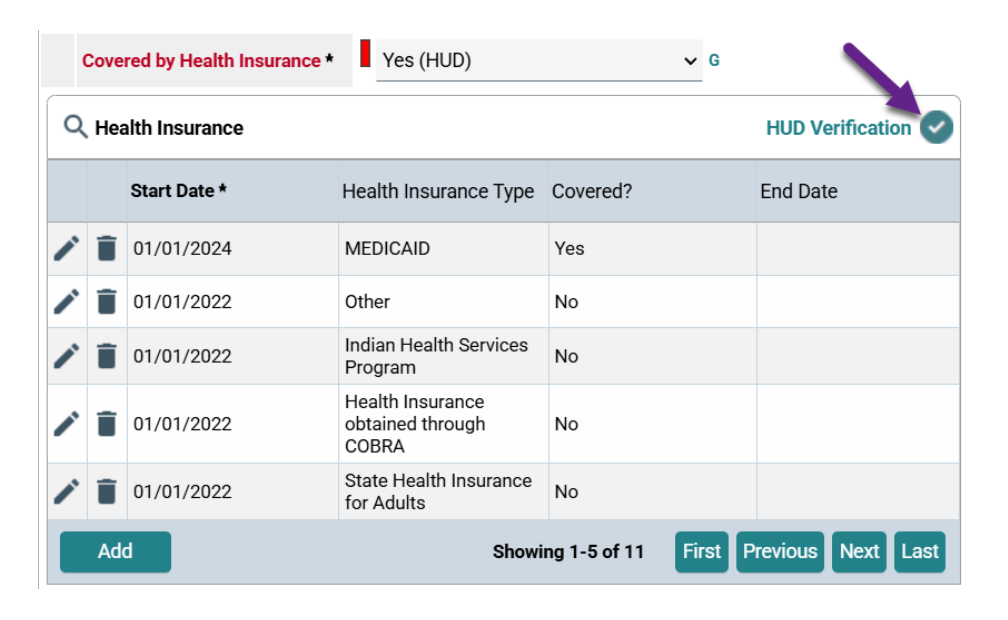
Step 3 – Update the Overall Yes/No field (if needed).
If the change your client reported requires a different response to the Overall Yes/No field, update that response. In this example our client has changed from having no Health Insurance to being covered by Medicaid, so the Overall Yes/No needs to be changed from “No” to “Yes.”
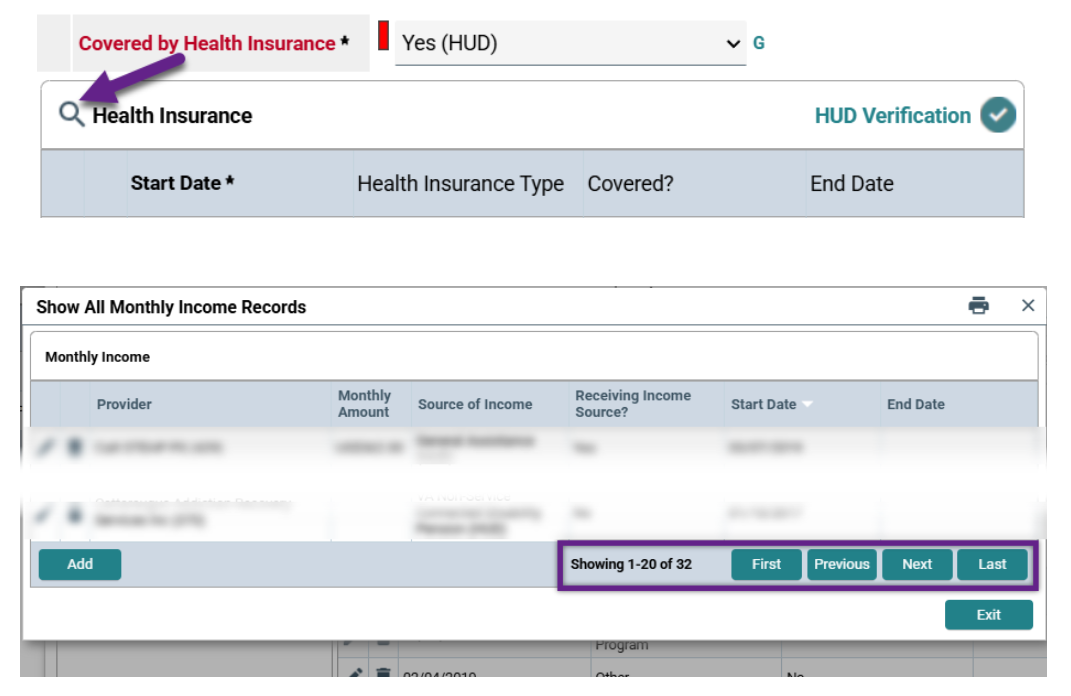
Step 4 – Click on the View All shortcut.
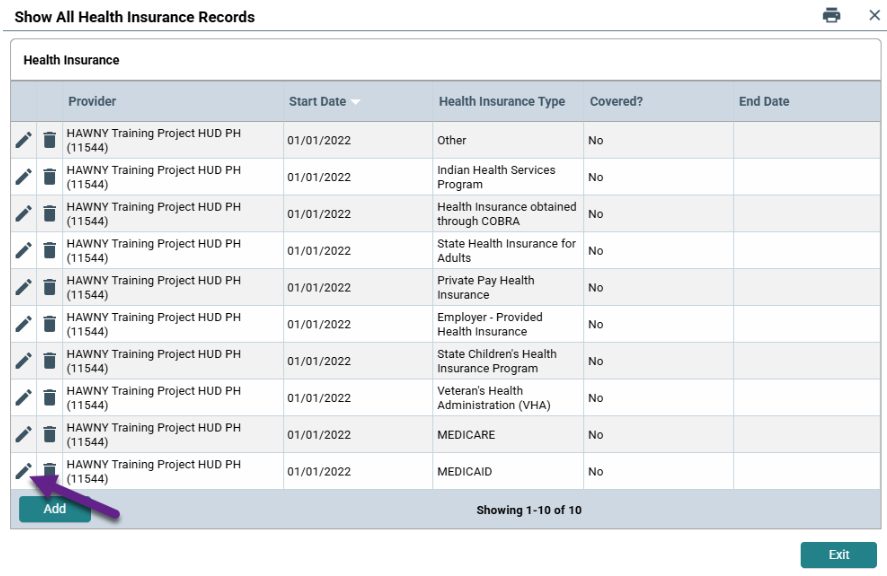
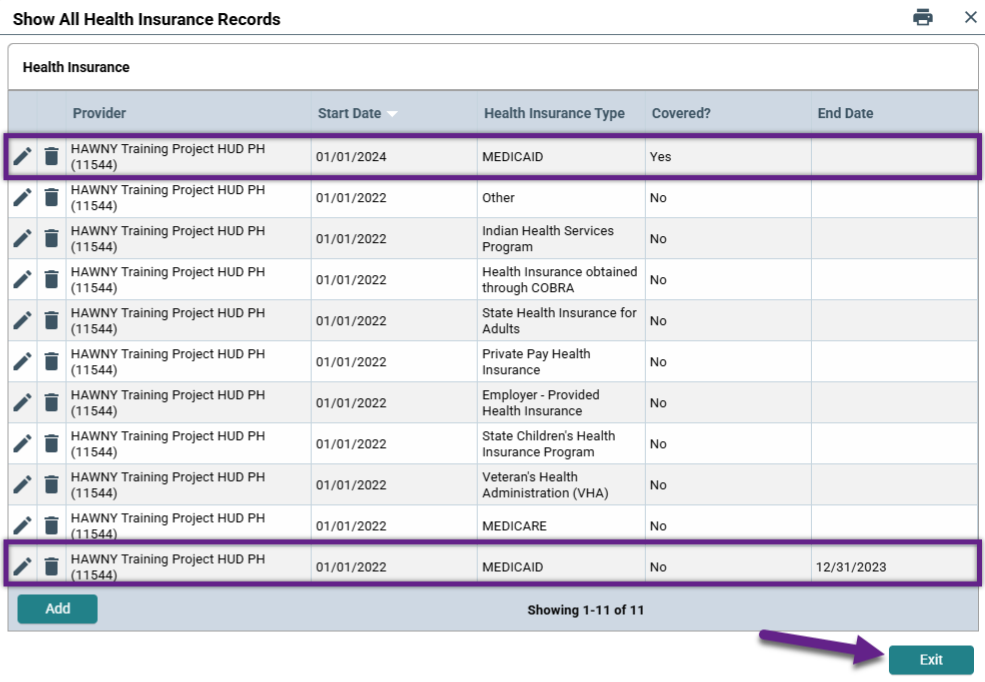
Click on the View All Shortcut (the magnifying glass icon) to expand the HUD Verification box into a large pop-up window. If your client has more than 20 rows you may need to use the navigation buttons in the bottom right to view more pages of rows and complete your update.
Step 5 – Enter an End Date in the row for the Type that has changed
First you will need to locate the row for the Type that has changed. In this example we will be updating this client’s Health Insurance HUD Verification to reflect their change in Medicaid coverage. We need to find the Medicaid row and click on the pencil icon to edit it.
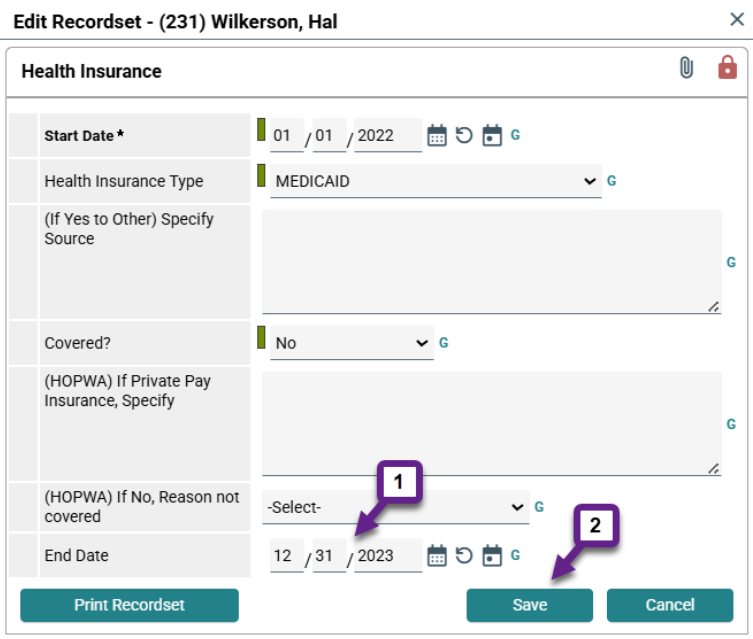
When you click on the pencil icon, a pop-up will appear where you can edit the information for that row. DO NOT change the response to the Determination drop-down field. The only things you need to do in this pop-up are 1) add an end date and 2) save the row. We call a row with an End Date a Closed Row.
Note: The end date for the initial row must be the day before the change happened. In this example, the client began receiving Medicaid on 1/1/2024 so the end date for the Medicaid row showing they were not receiving Medicaid needs to be 12/31/2023.
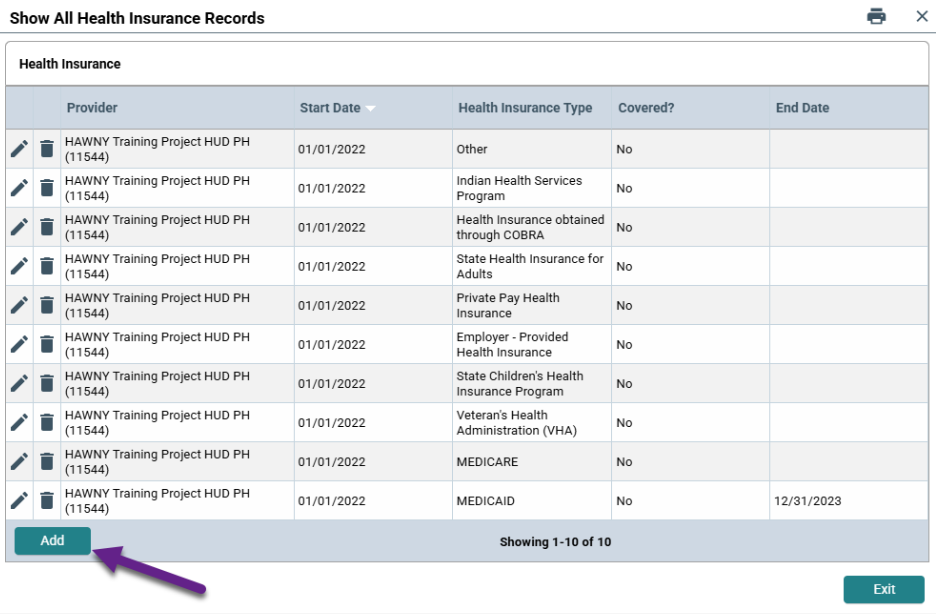
Step 6 – Create the new row for the Type that has changed.
Now we need to add a new row for the Type that we just closed and that reflects the client’s current situation. In this example we will be updating this client’s Health Insurance HUD Verification to reflect their change in Medicaid coverage. We need to click on the Add button to add a new row for Medicaid that starts when the client was first covered/the day after the end date used to close the previous row.
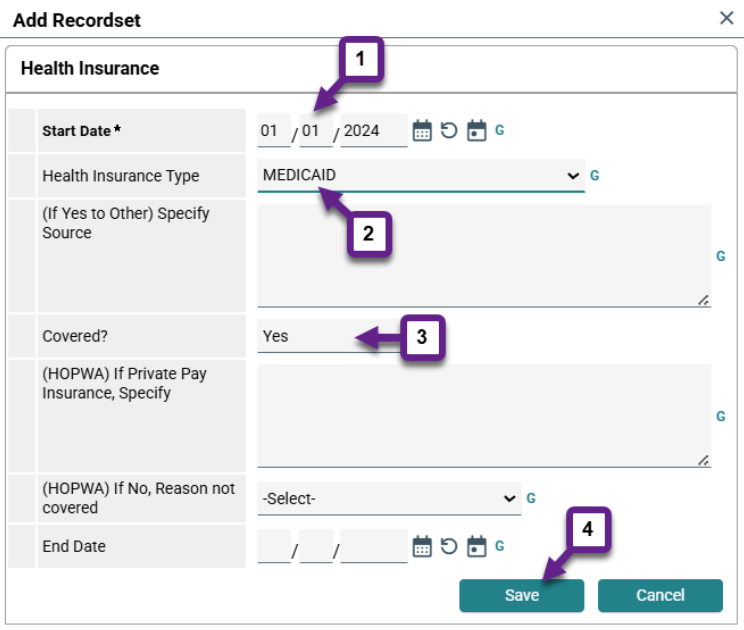
When you click on the Add button, a pop-up will appear where you can enter the information for the new row. There are four (4) things that you need to do in this pop-up window. 1) Verify that the Start Date is accurate. This will default to the System Date but you can change it to any date prior to the system date, if needed. 2) Select the same Type that you just closed from the Type drop-down menu. 3) Select the appropriate choice from the Determination drop-down menu. 4) Save the row.
Note: The Monthly Income and Disabilities HUD pop-ups have additional information, refer to the Creating HUD Verifications and/or Updating Income and Sources articles linked below for more information.
You should now have two rows for the Source or Type that has changed, the original row and the one you just created. The End Date on the original row should be the day before the Start Date of the new row. Once this is accurately completed, click on the Exit button in the bottom right of the View All pop-up window.
Step 7 – Double check that the HUD Verification Status shows a teal check mark.
If you have done the update correctly, the HUD Verification Status should still be a teal checkmark. If it has changed to a red triangle, you have made an error somewhere in the process. Use the HUD Verification Shortcut to find which Type doesn’t have an Open Row.
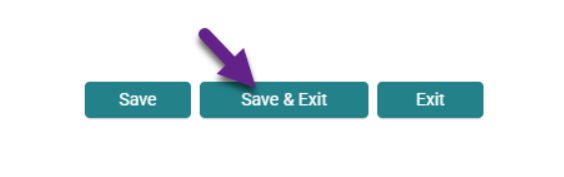
Step 8 – Save and Exit the Assessment.
The last thing we have to do is save the Interim Review (Update). Scroll down to the bottom of the Assessment and click on the Save and Exit button.
Related Articles
Switching Between Projects (Enter Data As)
Changing the System Date (Back Date Mode)
Frequently Asked Questions (FAQs)
What should I use as the “Start Date” for a row?
When creating rows during an update to a HUD Verification, the start date for a row should be the date the change happened. However, if the client doesn’t know the exact date it is acceptable to use an estimated date or the date you were informed of the change.
When should I add an “End Date” to a row?
There are only two reasons to add an “End Date” to a row.
- If the response to the Determination drop-down field for a Type changes. For example, if a client is no longer receiving any earned income because they are unemployed, the original row with the “yes” response in the HUD Verifications box must be given an end date that matches the date the client was terminated. A new row for that Type must then be created, with a start date of the day after the client was terminated, with a “no” response for the Determination.
- If, the amount for a specific type of income changes. For example, if the amount of SSI a client receives changes the original SSI row must be given an end date for the day before the amount changed and a new “yes” row for SSI must be created with the new amount and a start date of the day the amount changed.
When should I change a “yes” response to a “no” for a row?
Do not ever change a “yes” response for a row to “no.” Instead, add an end date to the “yes” row and create a new row for that Type with a “no” response.
Still having trouble?
If you still have questions about updating HUD Verifications in HMIS, please contact the HMIS Administration Team at [email protected].